At TechGuilds, we’re committed to finding and following best practices for Sitecore development and usage. As I elaborated on in my previous post, we’re also focused on making the experience editor as user-friendly as possible. While the XPE can be extended through programmatic means, it’s also important to know how to use it to its potential with Sitecore’s out-of-the-box functionality. That’s why we follow a checklist when setting up any given component.
The idea is to make sure that users can do as much within the XPE as possible, if not everything. The ideal Sitecore experience for a content author should be something like building with LEGO. It’s the developer’s job to make the mould and pour the plastic. The content authors should simply build with the pieces the developer gives them. Developing components for the XPE is an art of striking a balance between focus and flexibility. We want component functionality to be clear and consistent, but we also want to give content authors the tools to extend it to fit all of their needs.
There isn’t any getting around teaching content authors the relationships between renderings, datasources, layouts, and the content tree. However, there are some things we can do to make these relationships far more intuitive and easy to manage, and they involve little to no code. The following is the checklist we’ve been using in our development.
#1: Rendering and Placeholder Chrome
I know I mentioned out-of-the-box functionality first, but I would be remiss to leave out one of the most useful extensions of experience editor functionality: visual “chrome” for renderings and placeholders. I already got into this in my last blog post, so I highly recommend you check that one out. The best thing about it is that the chrome itself is created through CSS, so it’s highly customizable. Everybody I’ve talked to and shown this says that it should be available in Sitecore by default.
I do understand why Sitecore doesn’t include it: it adds padding between the elements on the page in the experience editor, meaning you have to switch between the XPE and preview modes to see what the final site will look like. However, the hierarchy of renderings and placeholders can be confusing for content authors, and being able to click on headers for these individually (rather than clicking the “go to parent component” button) is intuitive. Again, this extension is highly customizable, so how intrusive it is is ultimately up to you.
#2: Placeholder Names
Placeholders are defined in layouts and renderings. In MVC these are in the .cshtml view files. My rule for naming placeholders is to name them after the content you’re going to place inside of them, as well as to name them plural. For instance, I developed a carousel component that featured a placeholder for slides. The placeholder was named, simply enough, “carousel slides.” I know this is a simple tip but it makes navigating the layout hierarchy so much easier, especially without the Placeholder/Rendering chrome mentioned above.
#3: Placeholder Settings
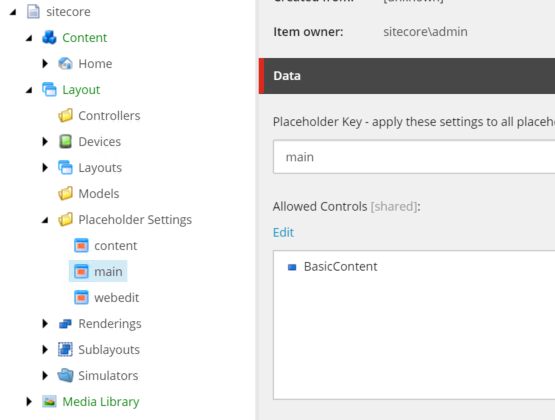
You should use placeholder settings if you or your content authors are going to create pages from the Experience Editor. You can assign components to placeholders in the content editor by going into presentation-layout-details, but this method isn’t friendly for content authors. In the XPE, if a placeholder doesn’t have a corresponding Placeholder Settings item, clicking the “add here” button on it will simply show you the entire tree of renderings and sublayouts - also not the most friendly for our content authors. The best option for adding components in the XPE is to create Placeholder Settings items that correspond to every placeholder you’re going to use, then designate specific renderings in the “allowed controls” field.
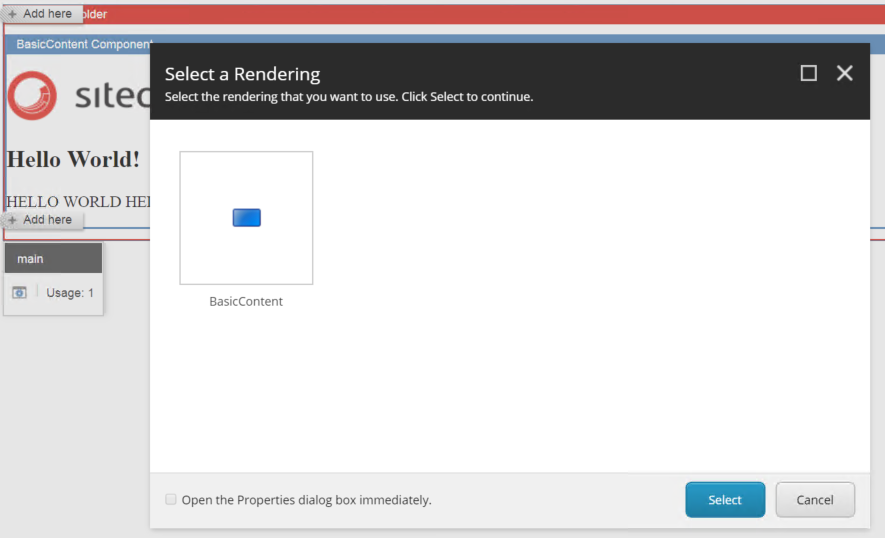
The “Select a Rendering” window that pops up when clicking on a placeholder will only show the renderings you’ve designated for that specific placeholder, which means that content authors won’t have to go looking for the correct rendering. This has the added bonus of training the content authors to associate certain renderings with certain placeholders.
#4 Rendering Thumbnails
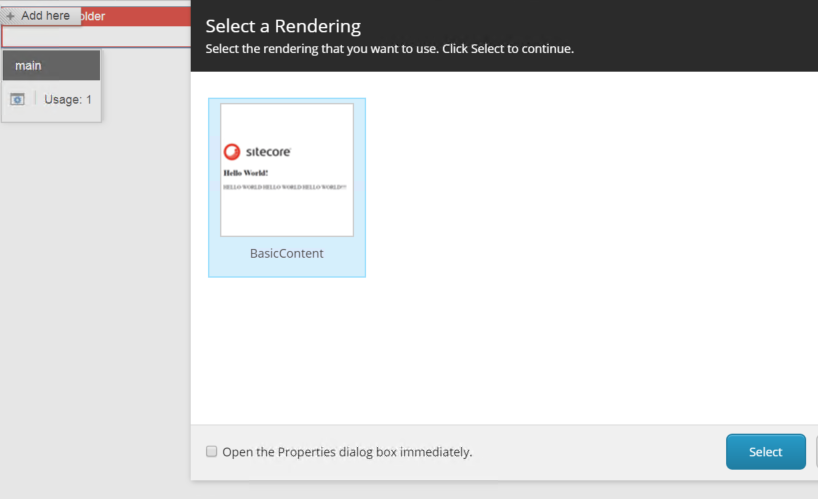
Just to make things really obvious, for any given rendering you can add a thumbnail image that will show up in the “Select a Rendering” window. You can have a designer create a special icon, or you can simply upload a screenshot of the component in action. This way, content authors don’t have to wonder what any given rendering does - they’ll simply see them and recognize what they’re looking for.
To add a thumbnail to a rendering, you’ll need to enable standard fields to see the thumbnail field. In the content editor, click the “view” tab, then check “standard fields.” The thumbnail field will be under the “Appearance” section of any given component item. From there you can select an image from the media library, where you can also upload images from your machine.
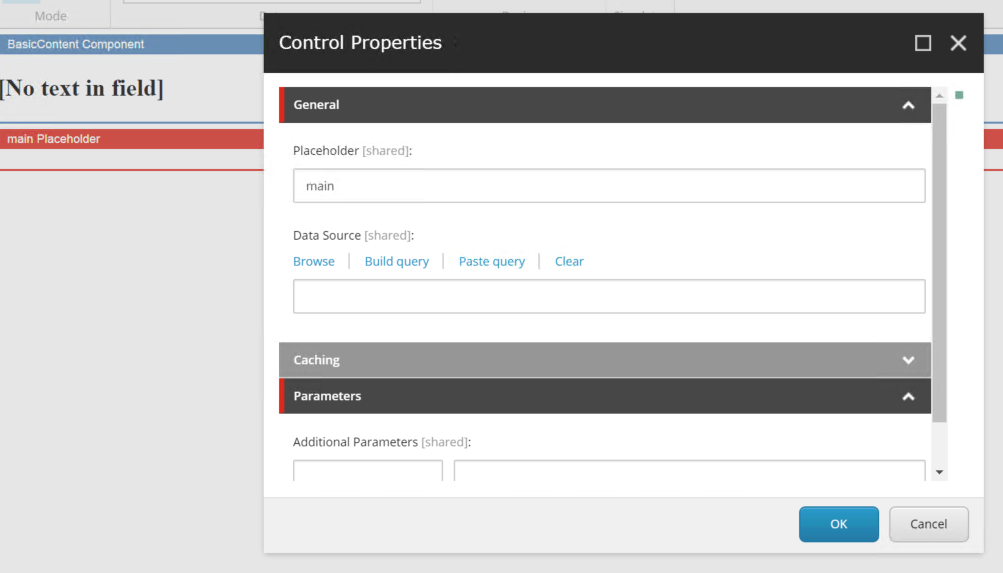
#5 Always “Open Properties after Add”
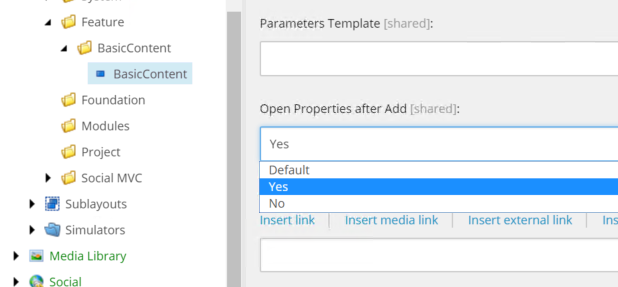
In the “Select a Rendering” window, there’s a checkbox that says “Open the Properties dialog box immediately.” Your average content author isn’t going to know what this means or why it’s important. You then run the risk of adding a component to a page and not having a corresponding datasource item, or having any of the rendering parameters set. Sure, you can set these after adding the rendering in the XPE, but we’re trying to make this process as smooth as possible. In any given rendering, unless it’s a view rendering with no datasource, you want to set “Open Properties after Add” to “Yes.” This way, the control properties window with the datasource field and rendering parameters will come up after selecting a rendering.
#6 Set the Appropriate Datasource template
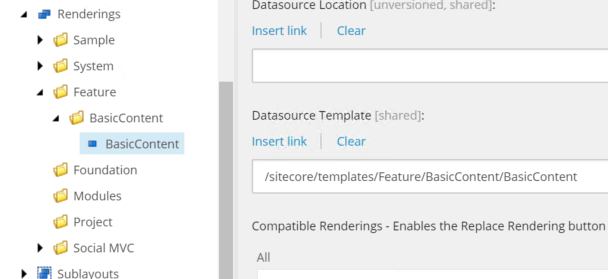
When selecting a datasource for a rendering, you want the author to either create a new item or select an existing item, and you want either one of those to be the correct item type. To make sure this happens, select the appropriate Datasource Template for any given rendering. Doing so will allow the content author to create new items for selected renderings from the experience editor, as opposed to having to create them in the content editor then connect them to renderings after the fact. This setting also prevents the content author from choosing an item with the wrong template for the rendering.
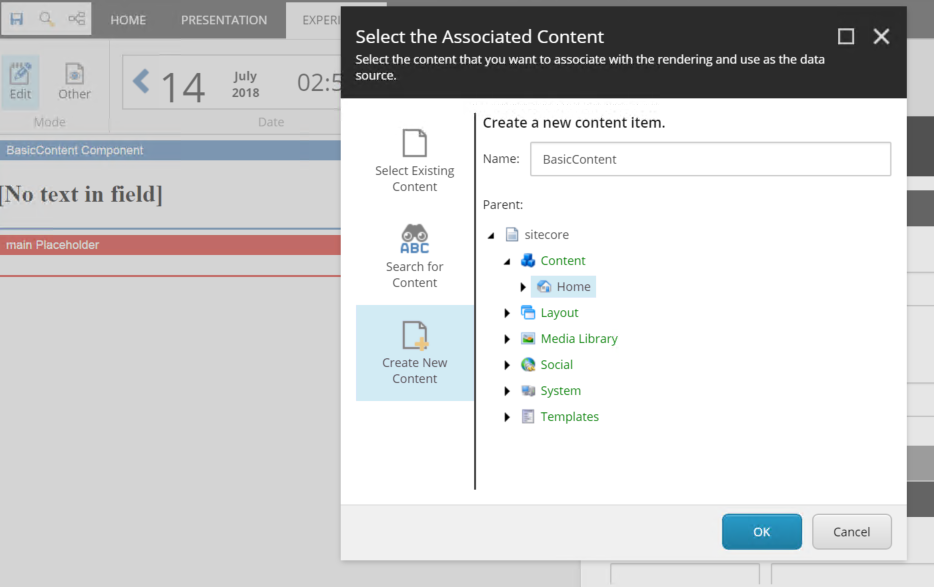
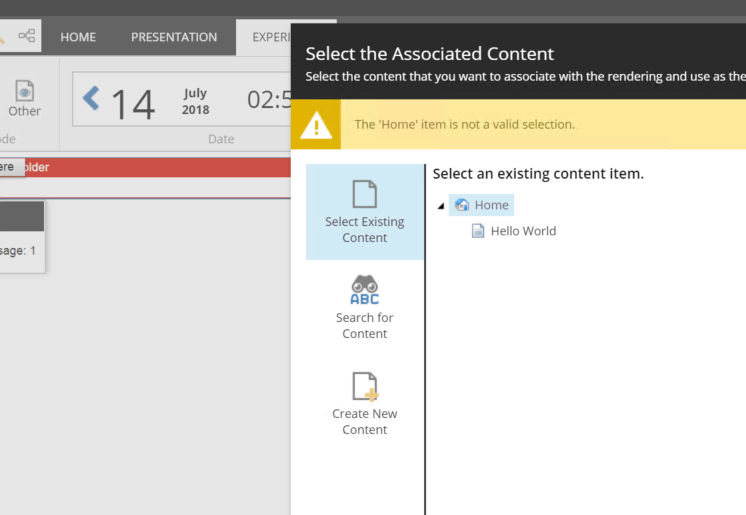
#7 Use Datasource Location Queries
When selecting or adding a datasource item for a rendering, the user doesn’t need to see the entire content tree. Setting the “Datasource Location” in the rendering item will reduce the content shown in the tree in the “Select the Associated Content” window. This has numerous advantages, the most obvious being that the content author won’t get lost trying to find or place the correct datasource item. However, if you write your query specifically enough, you can also organize your site’s content tree without having to explain how to the content authors.
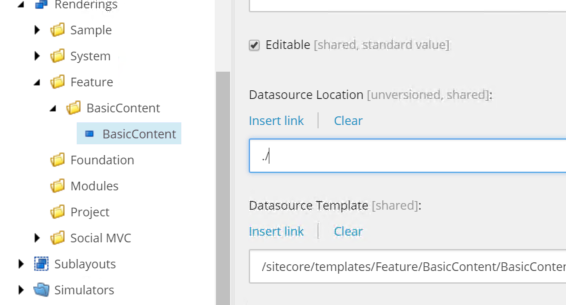
The fallback Datasource Location I use is “./”. This query shows only the home node for the relevant datasource item, and everything underneath it. However, if you do some research on Sitecore’s XPath queries, you can get even more specific, and even show multiple sections of the content tree.
#8. Use Custom Experience Editor Buttons
If you’re using Sitecore field renderers in your views, then your fields - including images, text, and numerous others - are directly editable from within the experience editor. However, there are plenty of scenarios in which your fields won’t be easily editable from the page. For example, if you’re using an image as a link, and both the image data and link data are coming from sitecore fieldrenderers, the XPE will allow you to edit the image but not the link.
To create a button that will let you edit a field, switch to the Core database in the content editor. In the content tree, navigate to Content>Applications>WebEdit>Custom Experience Buttons. Go ahead and make a folder in here and call it something like “Custom”. Right-click that folder and add a new item from template. In the “Insert from Template” window, navigate to System>WebEdit>Field Editor Button, and name it after the field you want to be able to edit in the XPE. For this simple example I’m going to call it “Edit Image” because it’s going to let the user change an image. Click okay.
For the sake of usability, we want to assign this button an icon. We’ll do this in a couple places. There’s an Icon field under the “Data” section, and another under the “Appearance” section. Use the same icon image for both, so it’ll show up in the Experience Editor and in the content tree.
The important part of the button data is the Field information. This button can be added to any component you wish, but you’ll need to specify which fields this button will allow you to edit. Since I want this button to allow me to edit the “Image” field in my BasicContent component, I’m going to put “Image” in the “Fields” field in the button item. If I wanted this button to allow me to edit other fields with different names in other components, I’d need to add those field names in the field as well, separated by pipes (“|”), like so: “Image|Background Image|Icon Image”. Warning: never put a pipe at the end of this list, as you’ll get an error.
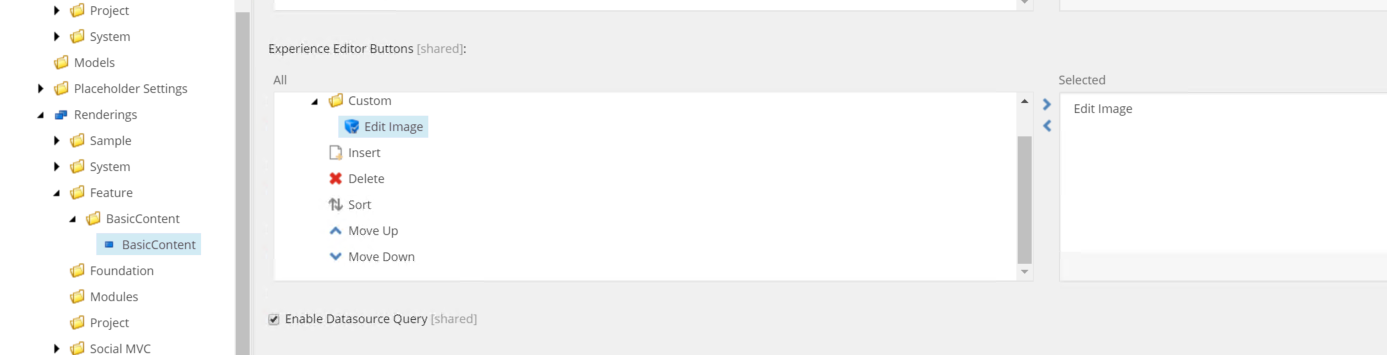
After creating a Custom Experience Button, you simply need to save and add it to your rendering of choice. Navigate to your rendering and, in the Editor Options scroll down to “Experience Editor Buttons.” The button you just created will be there. Select it for it to show up in the experience editor.
In this instance I’ve created an Experience Editor Button for a field that you can already change by simply clicking on the element in the XPE. This is of course redundant, but it’s not necessarily unwise. For the end-user, having multiple ways to access the same functionality can reduce the need for support and training. We want the XPE to be as intuitive as possible, but one user’s intuition may be different than another user’s.
I hope this guide has been helpful in making your components as Experience Editor-friendly as possible for your users, and in explaining the thinking behind these settings. I'm going to continue this series about Optimizing the XPE experience by getting into the code next and explaining edit frames.