Sitecore XM Cloud offers powerful personalization capabilities that allow you to deliver targeted content to your audience. In this article, we'll walk through the process of creating a personalized promotion on your home page that will appear on a specific date.
Step 1: Access the XM Cloud Pages Personalize Mode
- Log in to your Sitecore XM Cloud instance and navigate to the site and page you would like to personalize.
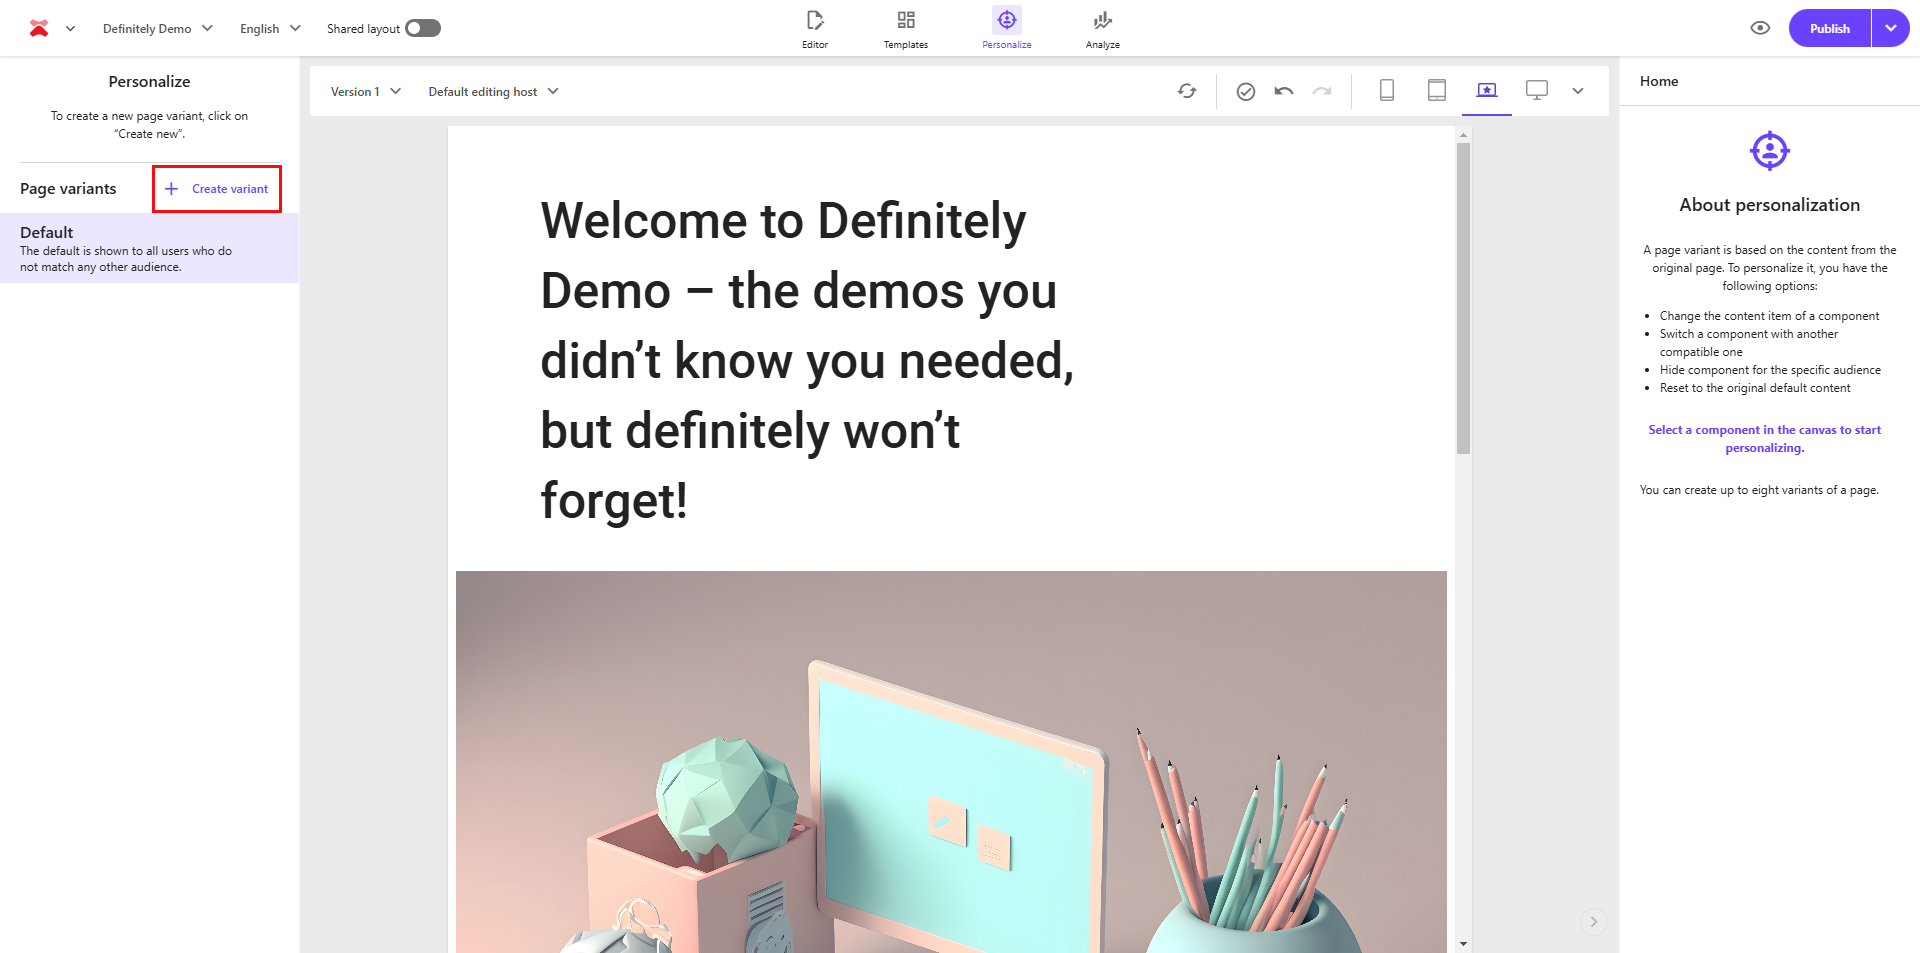
- Once you are in Pages on the page you would like to personalize, click on "Personalize" at the top of the page to enter Personalize mode.
Step 2: Create a New Page Variant
- In the Personalize panel on the left, click on "Create Variant" to begin the personalization process.
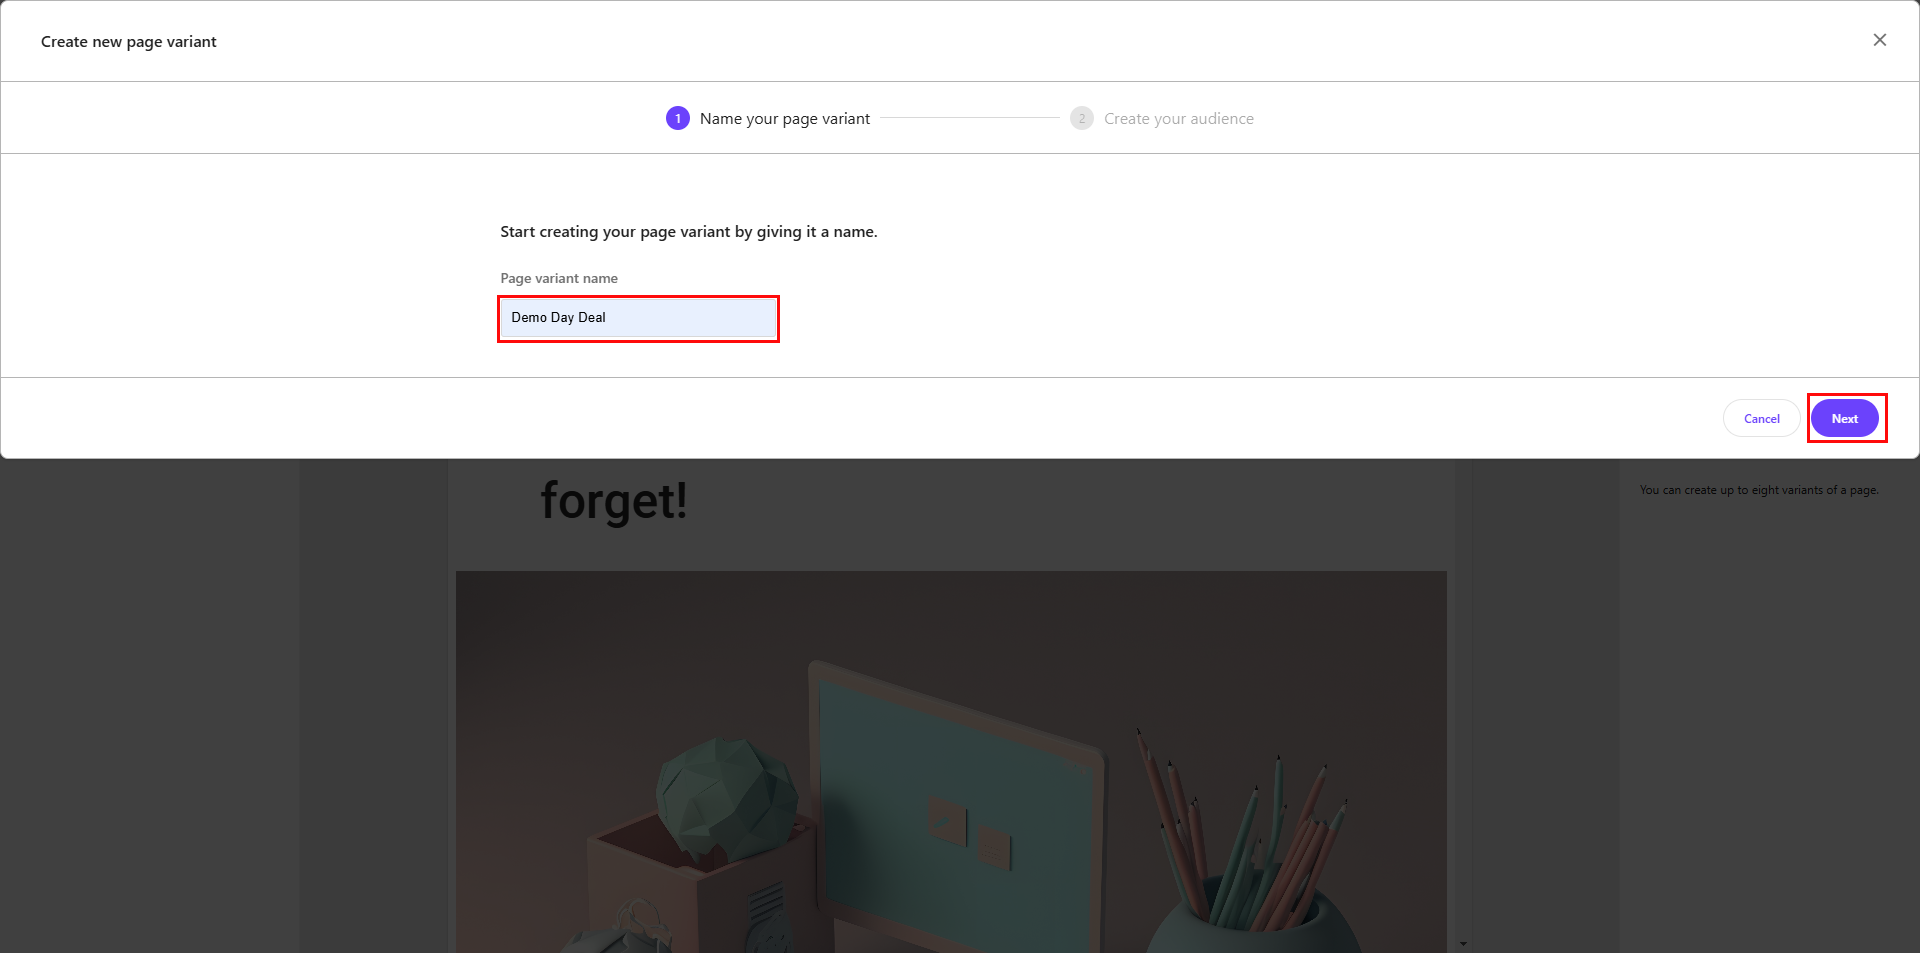
- Give your variant a descriptive name.
- Click "Next" to proceed to the audience creation step.
Step 3: Create Your Audience
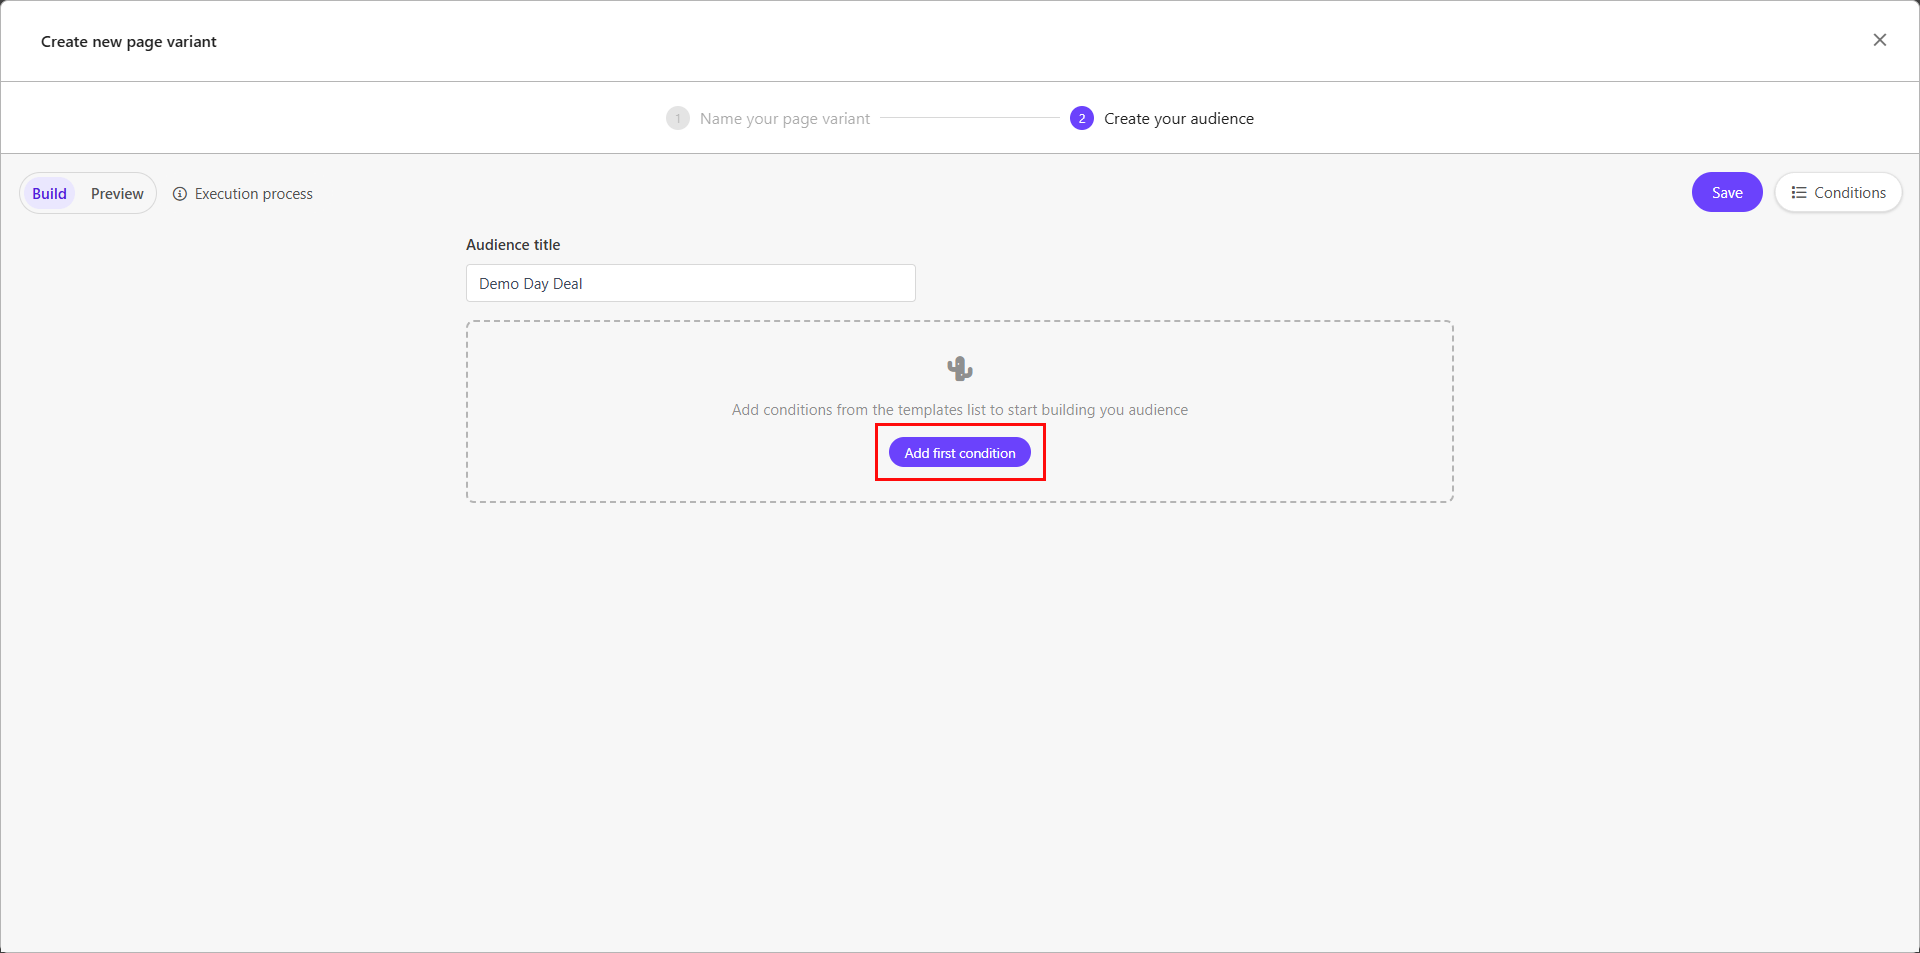
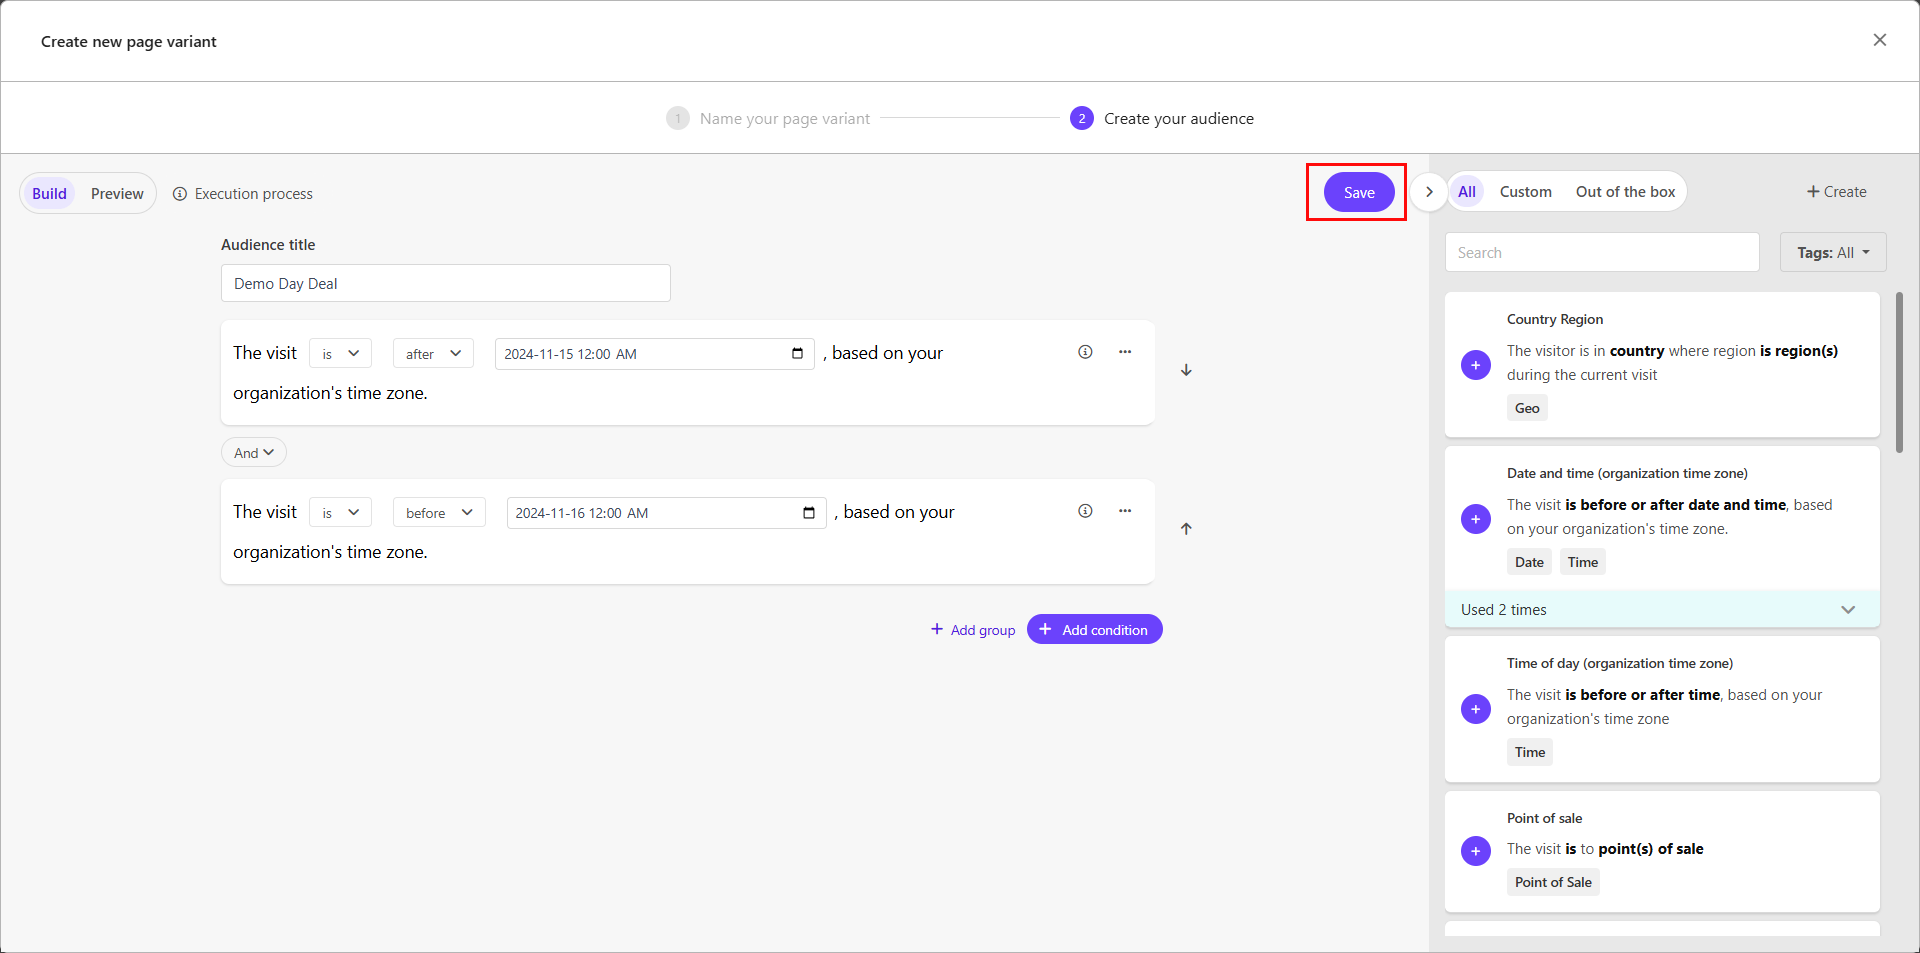
- In the “Create your audience” step, note that your audience has the title of the page variant you have just created.
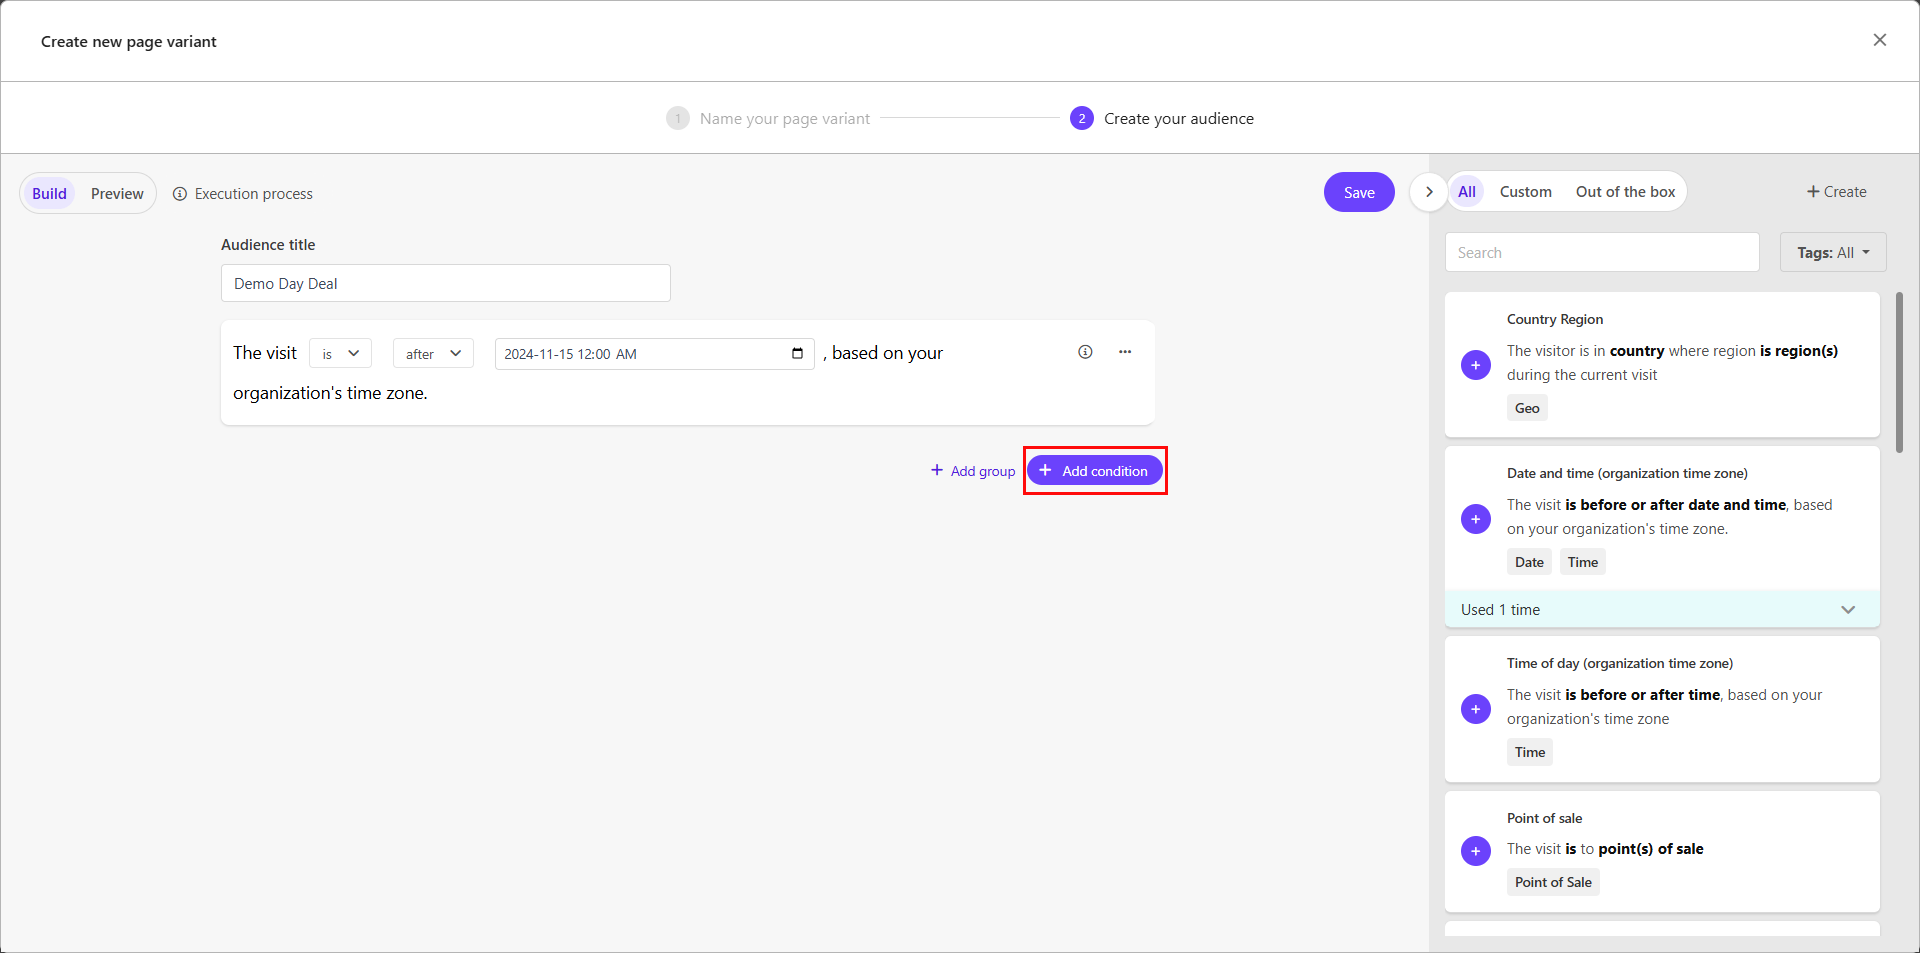
- Click on "Add first condition."
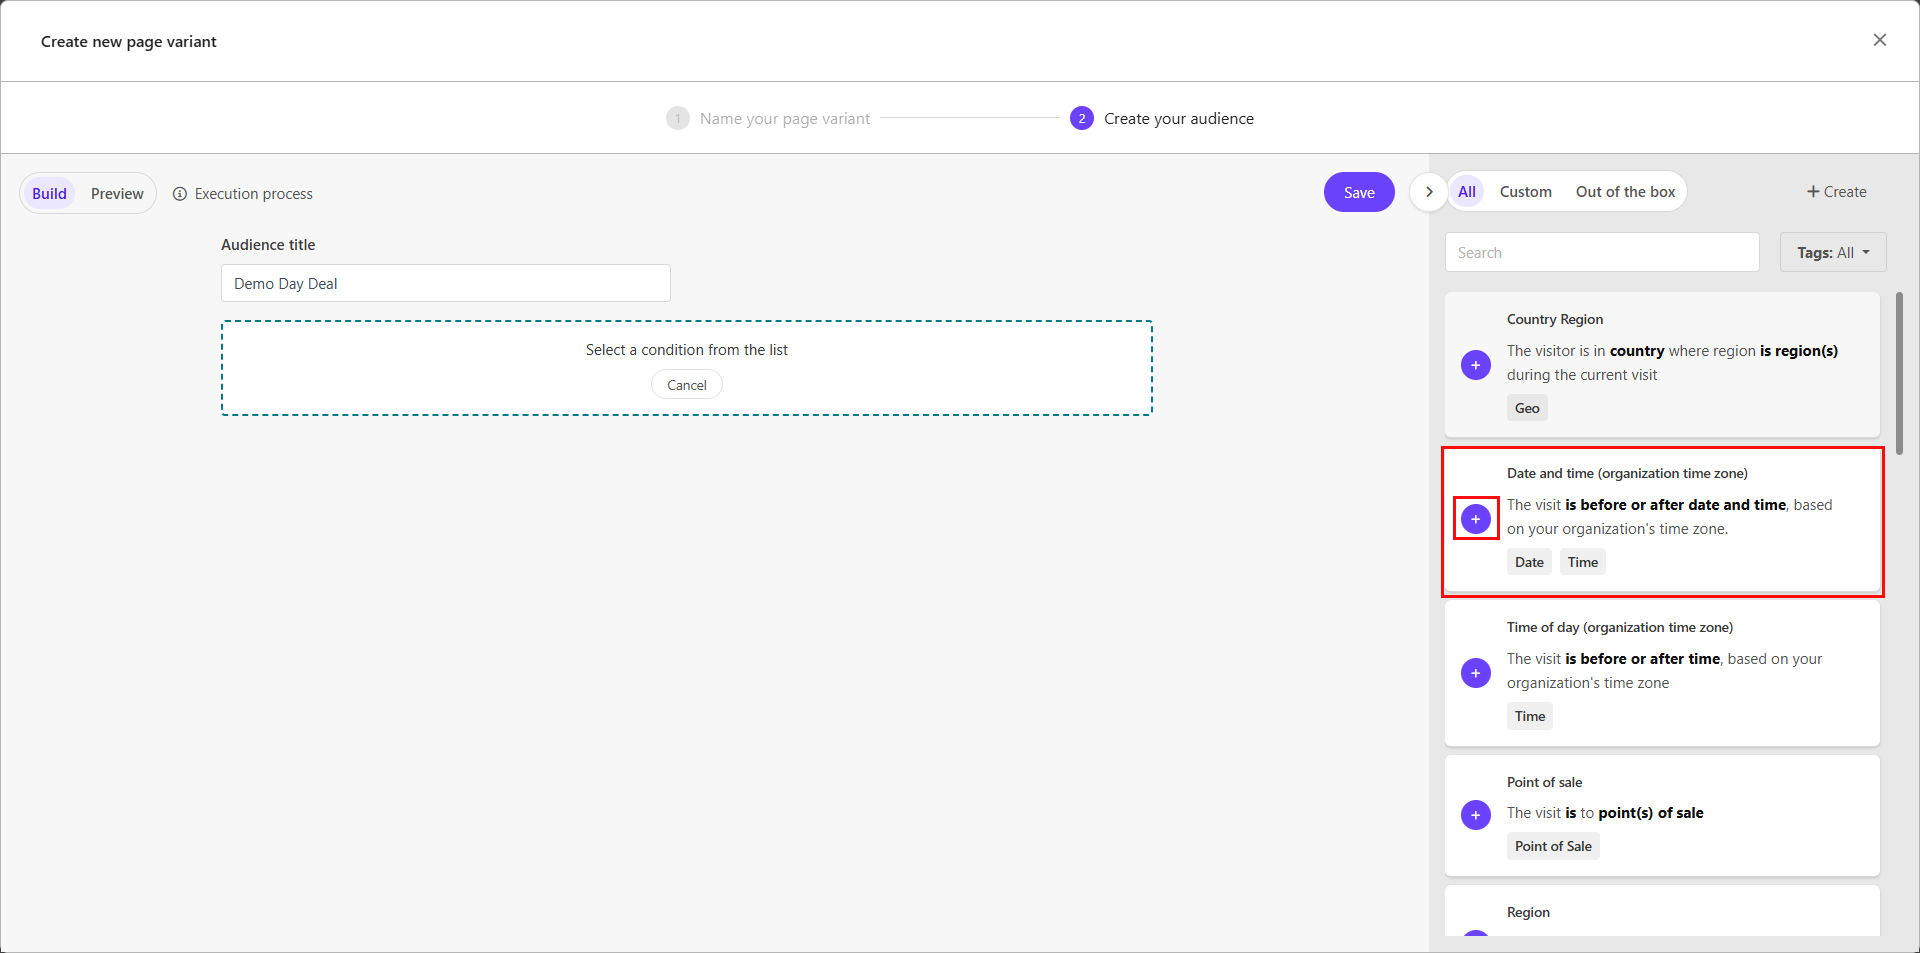
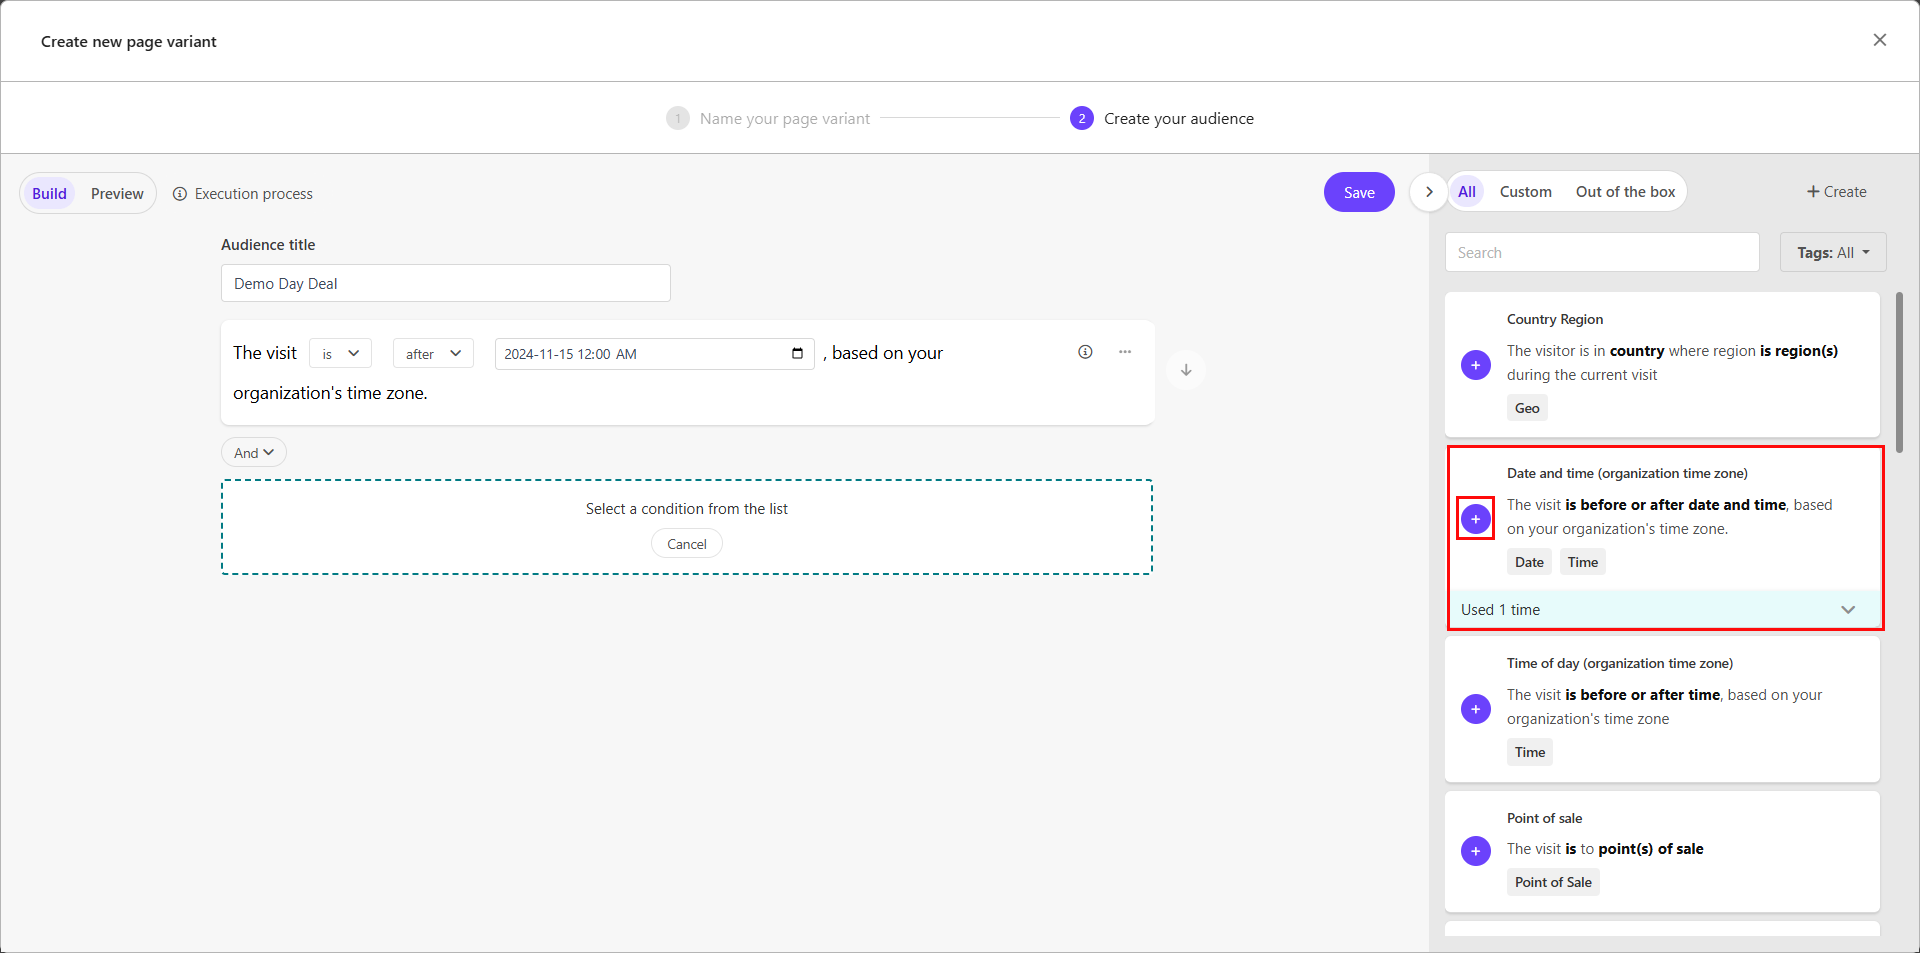
- From the list of pre-defined condition templates, select "Date and Time" by clicking on the plus sign next to it.
- Configure the date condition:
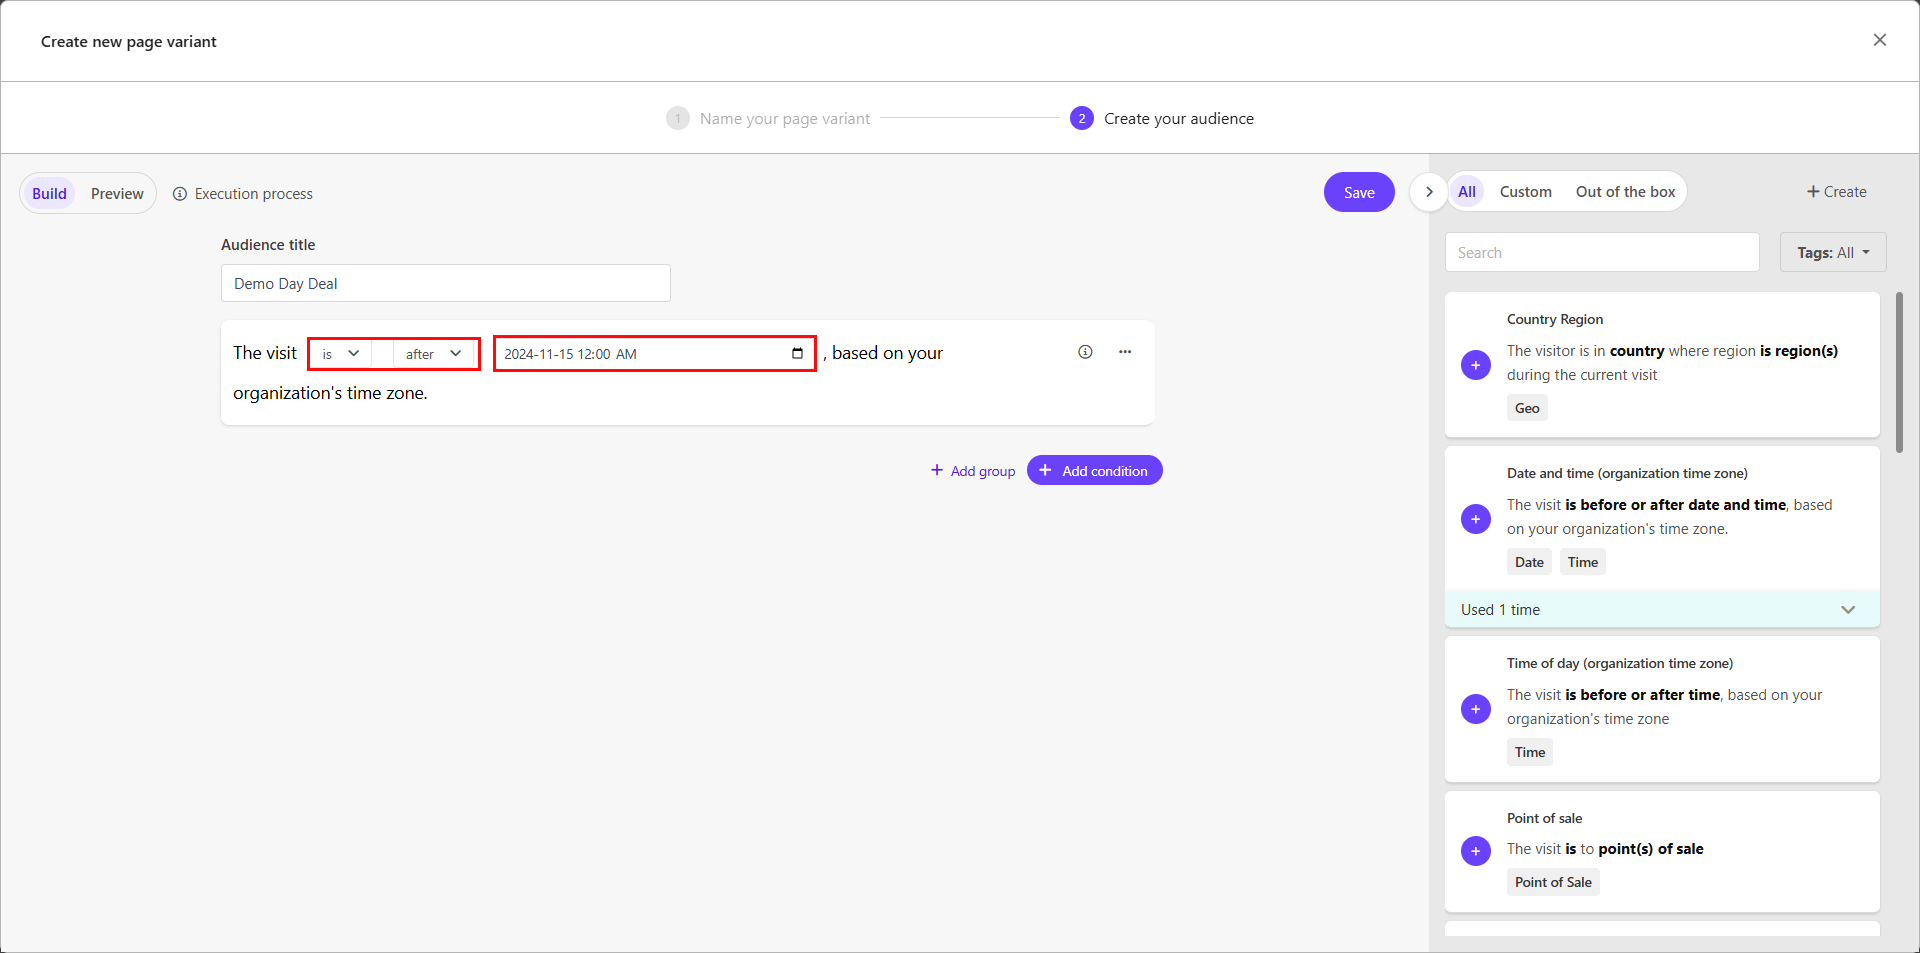
- Set the operators to "is" and "after".
- Choose the specific date when you want the promotion to start.
- To make the promotion end on a certain date, add another "Date and Time" condition:
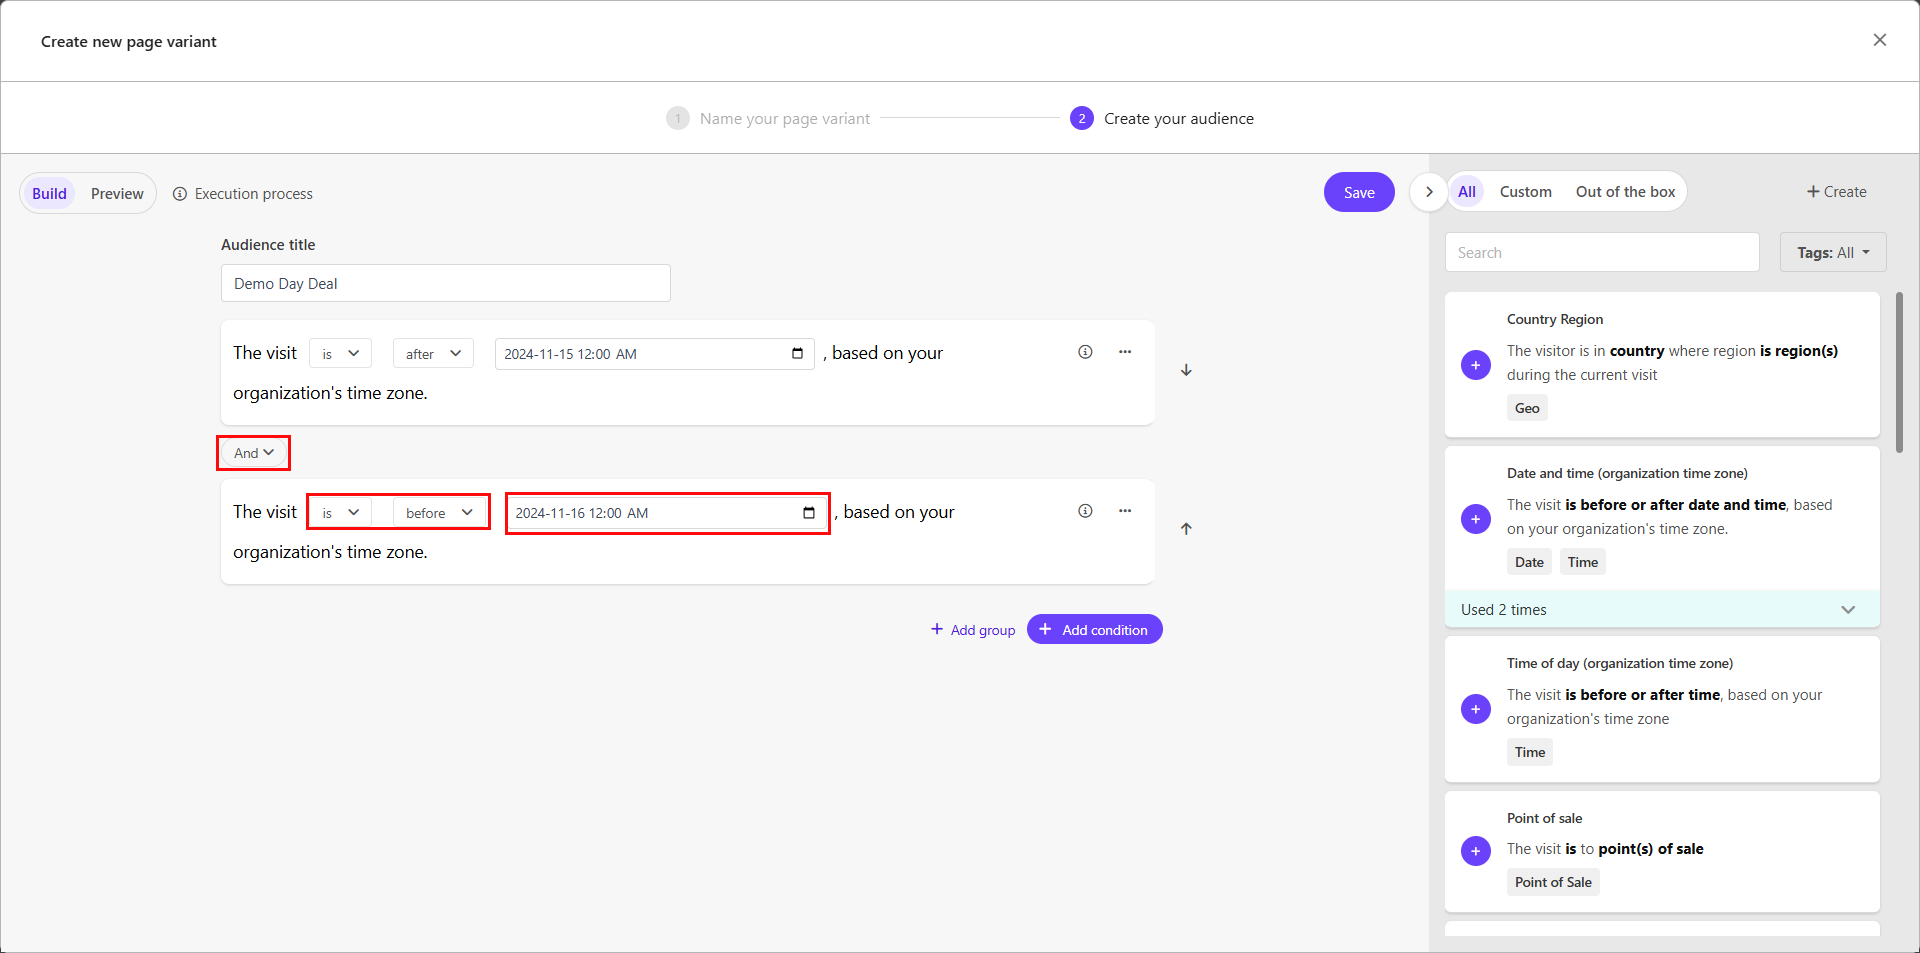
- Set the operators to "is" and "before" and choose the end date for your promotion.
- Combine these conditions using the "AND" operator if you're setting both start and end dates.
- Click “Save”. You will see a message that your audience was saved successfully, and you can now close the “Create new page variant” window.
Step 4: Customize the Page Variant
Now that you've set up the audience targeting, it's time to customize the page variant with your promotional content:
- In the Pages editor, locate the area where you want to personalize (show the promotion in this case).
- You have a few options:
- Assign a different content item to an existing component.
- Hide a component.
- Replace a component with another compatible component (in some cases).
- In this scenario, we will perform option 1 and assign a different content item to an existing component.
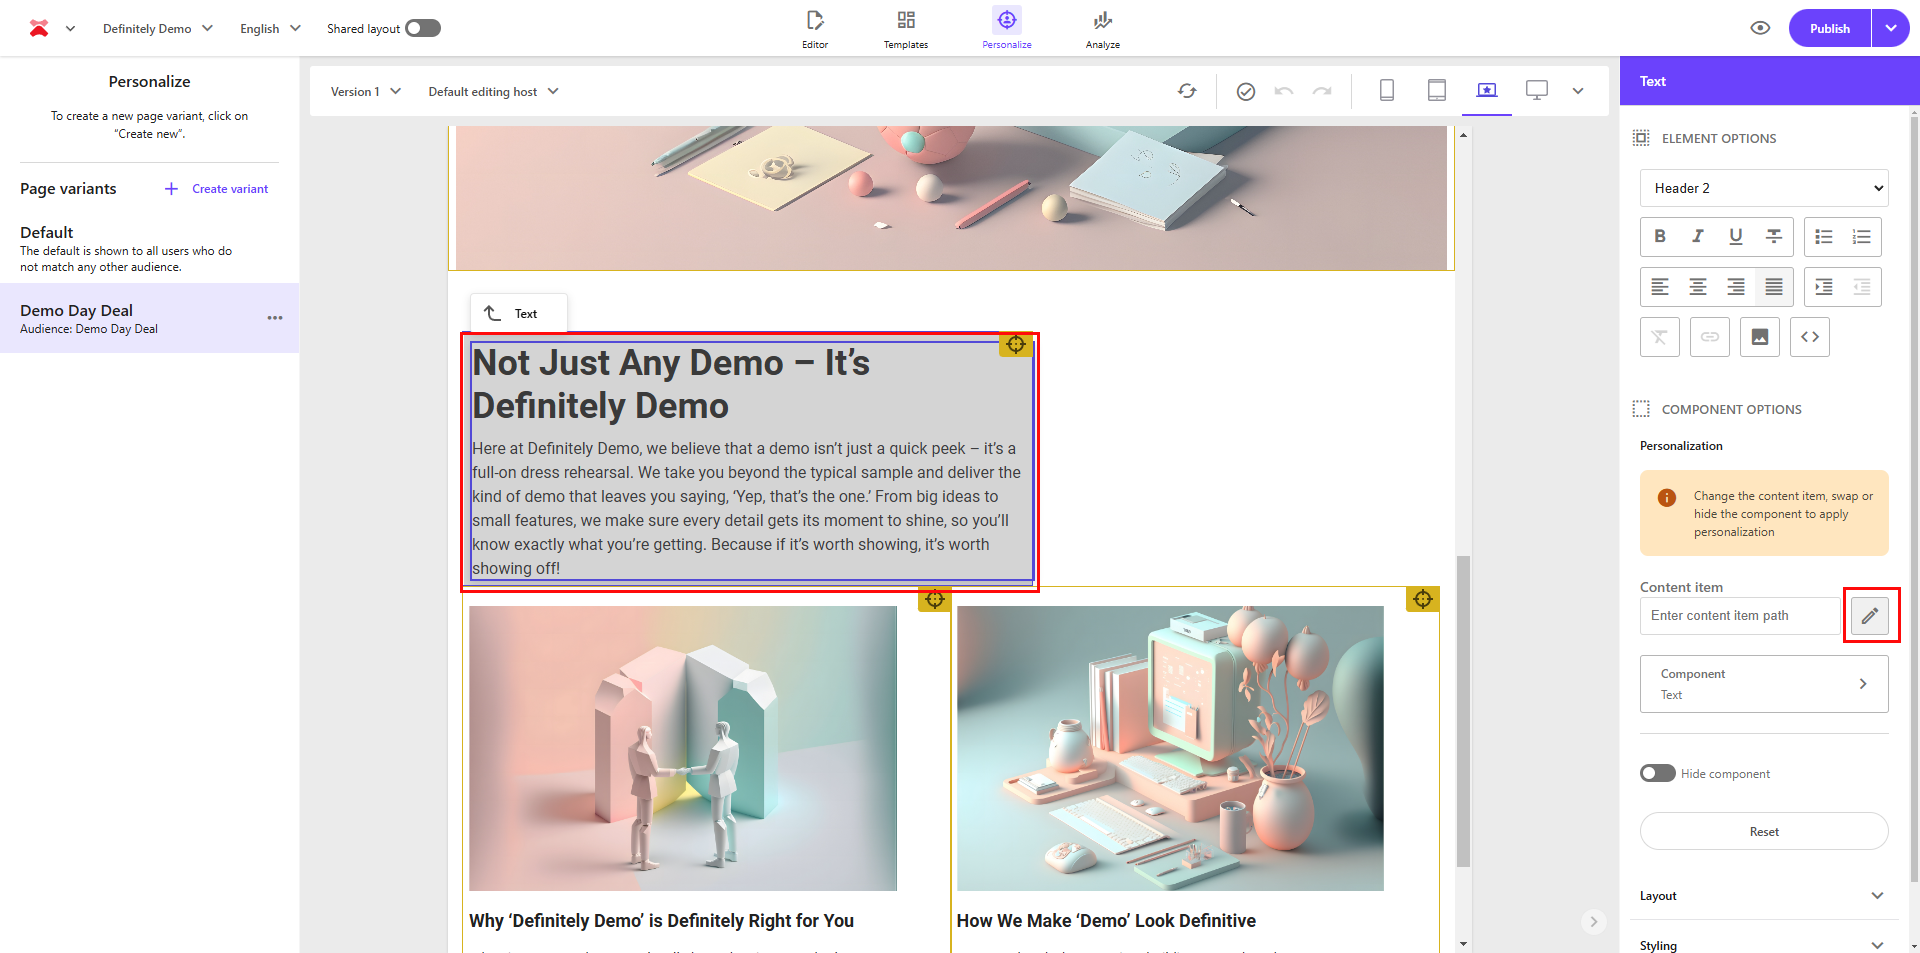
- Click on the component in question.
- In the right-hand side panel, click the pencil icon next to the content item field.
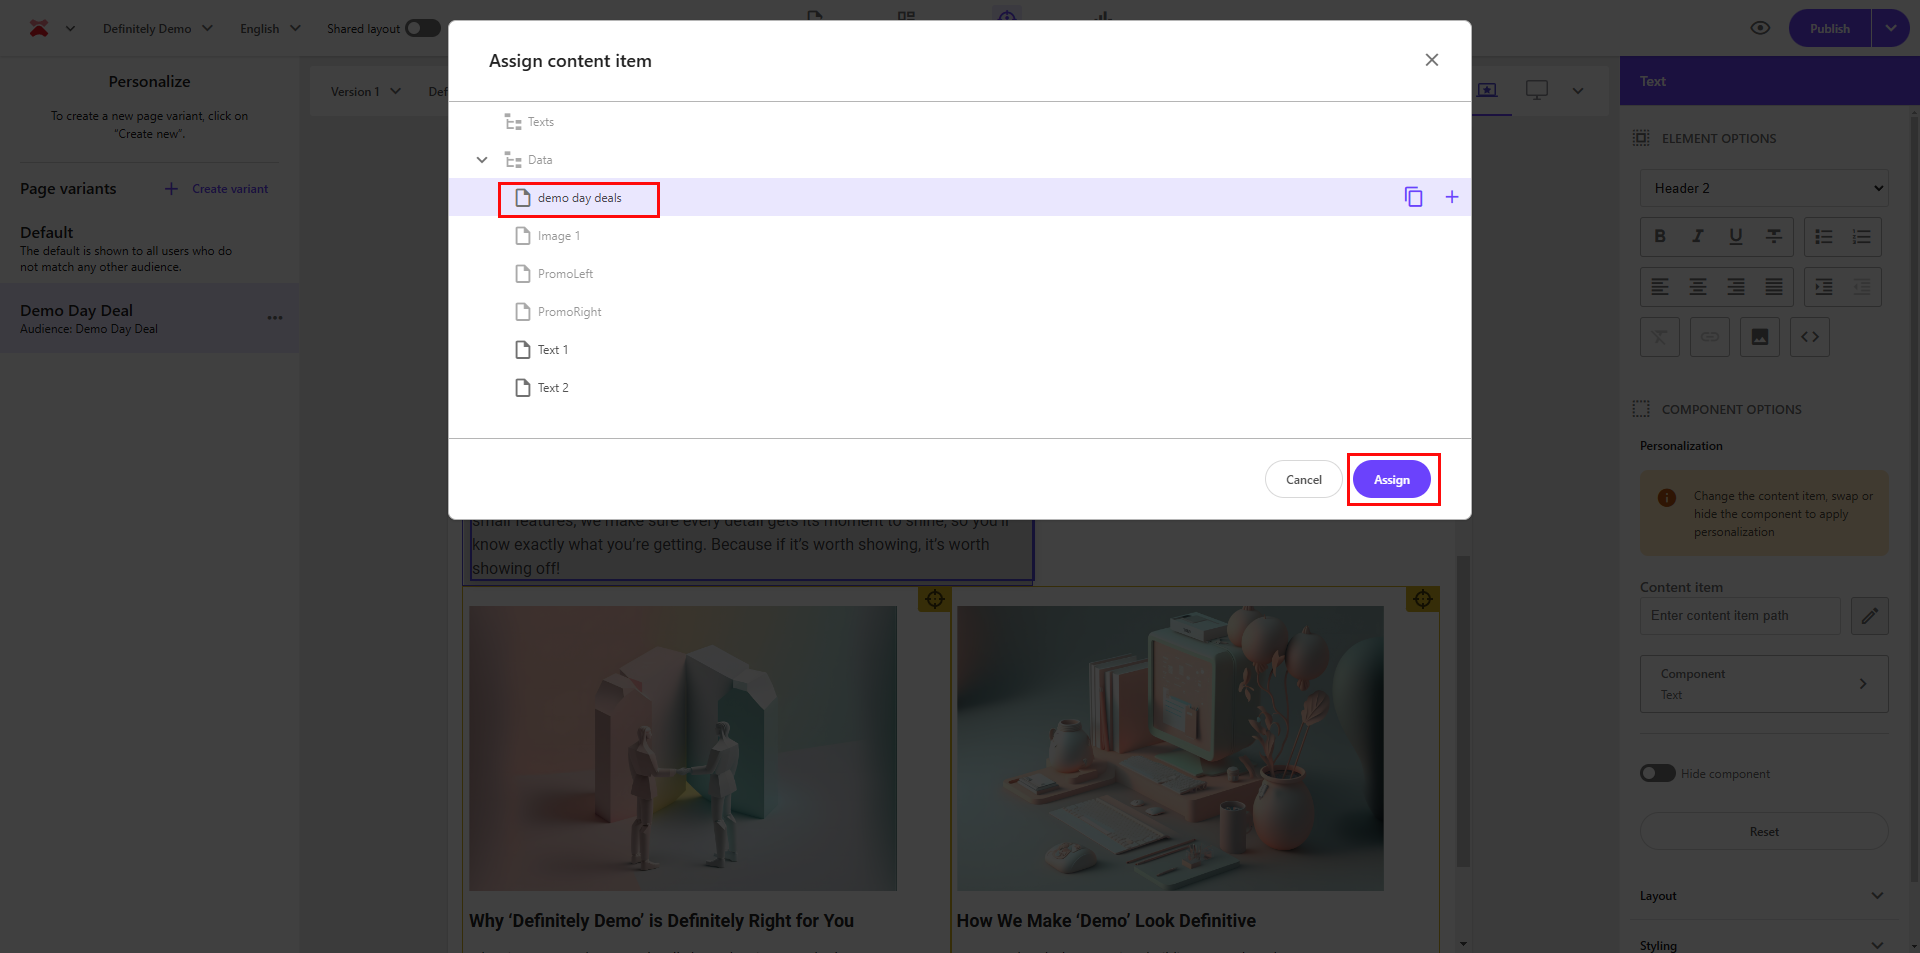
- Choose the desired content item—if you have created it already—and click “Assign”.
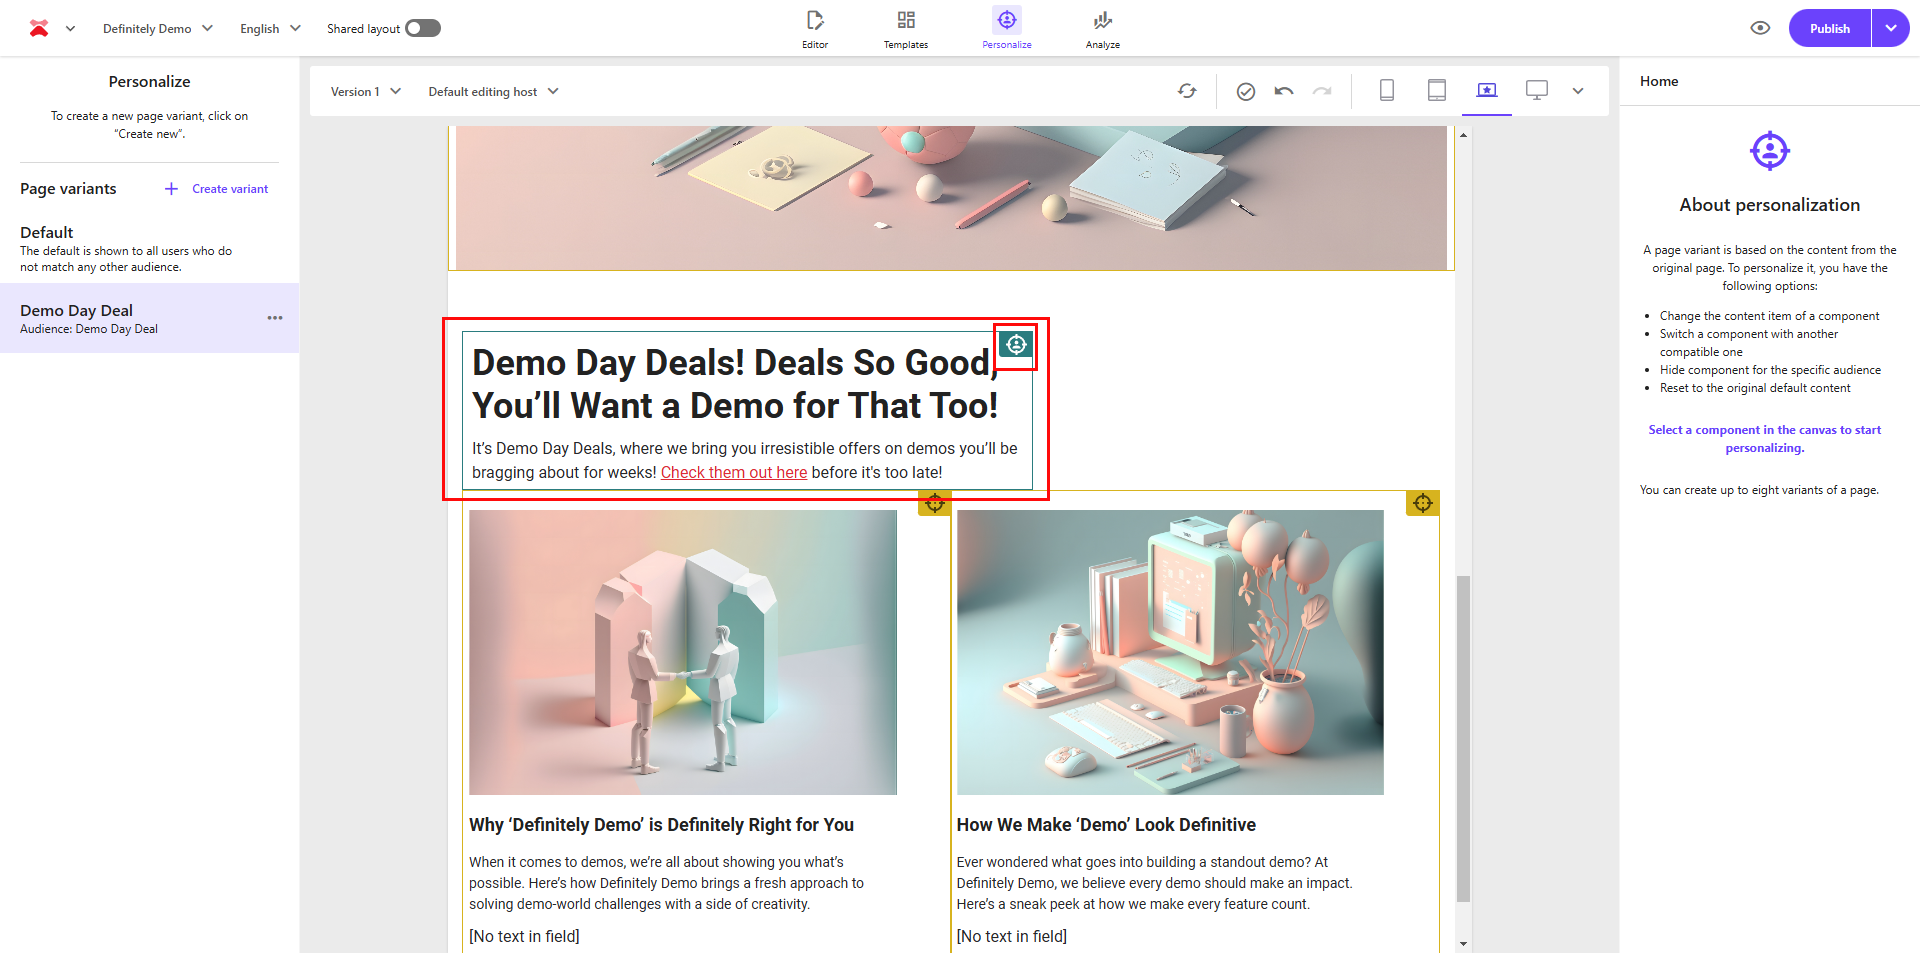
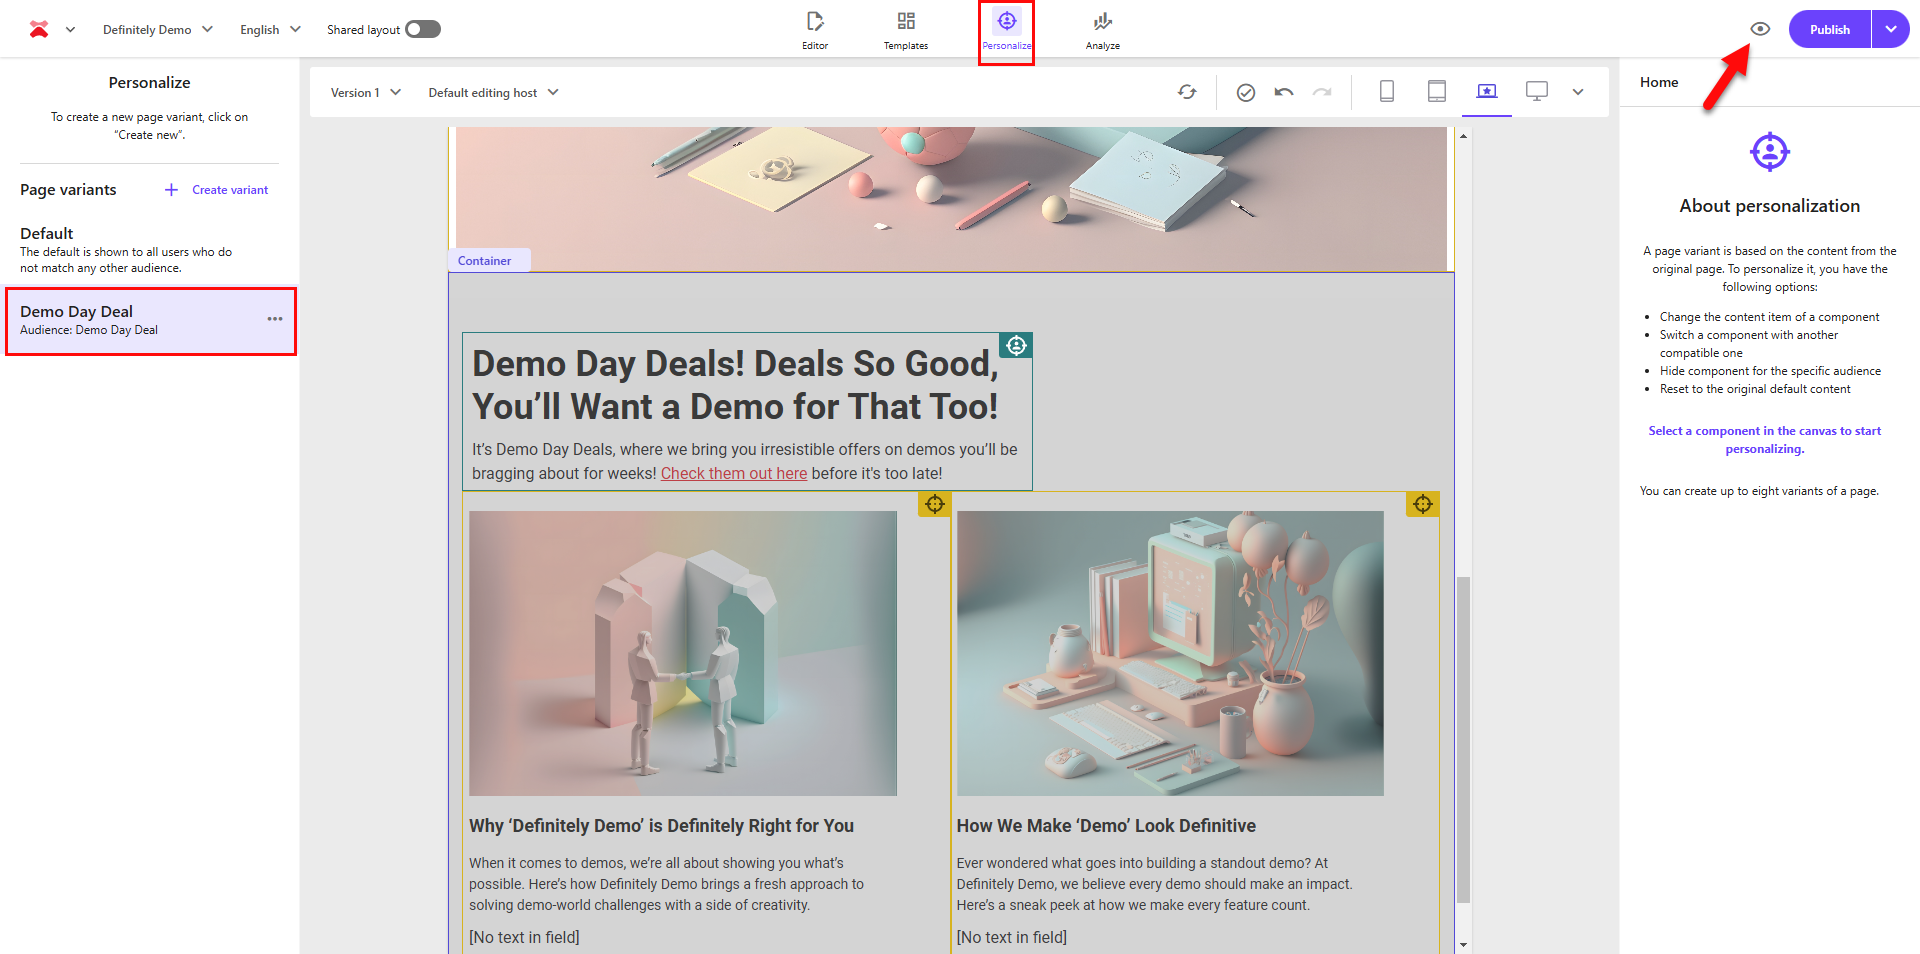
- The component that you have personalized will now have its border highlighted in teal, and an icon in the top-right corner of the component will also indicate personalization.
Step 5: Preview
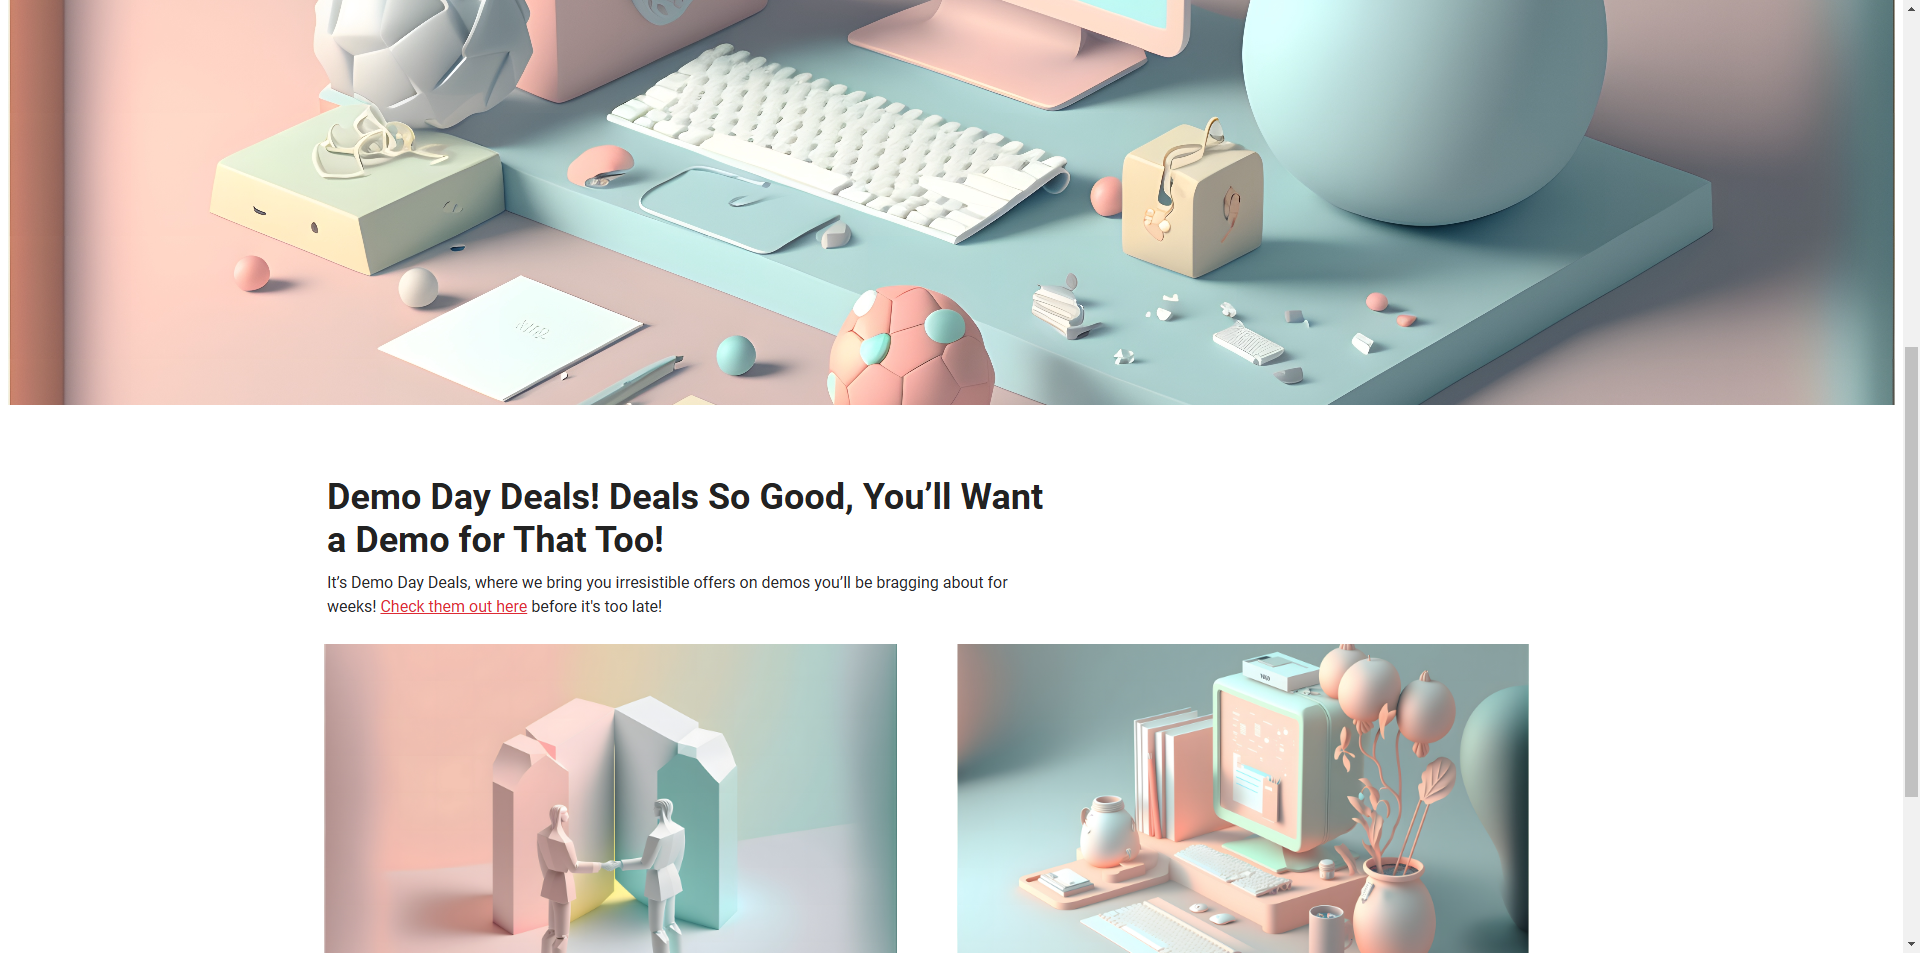
- While in Personalize mode and with the personalized variant selected, click the preview icon to see how your personalized variant will look.
Step 6: Publish Your Change
Once you're satisfied with your personalized variant:
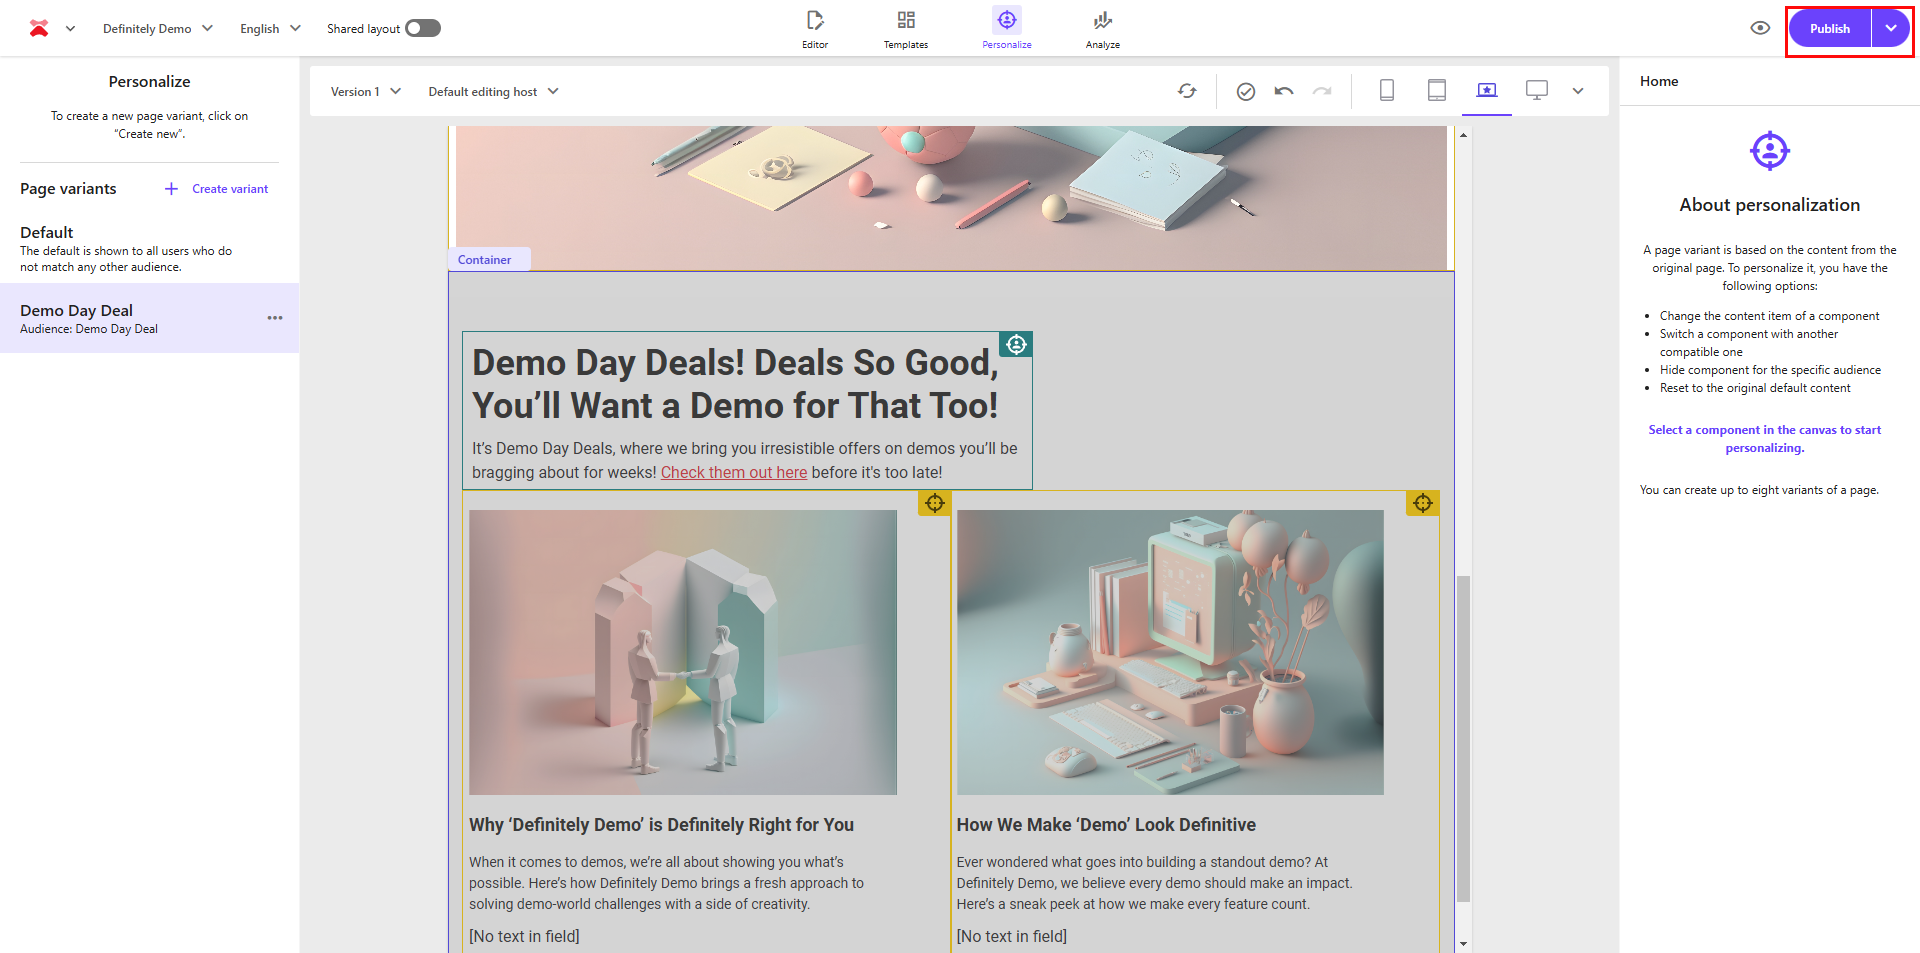
- Click the "Publish" button to make your changes live.
- Confirm that you want to publish the new variant along with any associated content items.
Step 7: Monitor and Analyze
After your promotion goes live:
- Use Sitecore's built-in analytics to track the performance of your personalized variant.
- Monitor engagement metrics to gauge the success of your promotion.
Best Practices
- Plan Ahead: Set up your personalized variant in advance of the promotion date.
- Content Preparation: Have all promotional assets ready before creating the variant.
- Testing: Thoroughly test your personalization rules across different devices and browsers.
- Fallback Content: Ensure you have appropriate content for users who don't meet the personalization criteria.
With these steps, you can easily create time-based, personalized promotions using Sitecore XM Cloud. But don’t forget, the platform’s personalization capabilities go beyond simple date-based targeting. You can mix and match different conditions to tailor your content more precisely, ensuring it reaches the ideal audience at the right time.


