In part 1 of How to A/B test a Sitecore form to optimize for conversions, we walked through steps one through three, where we created a variation of the form and created a component test. In this part we'll continue to set the test parameters and start testing.
Step four: Set the test parameters and start the test
- Upon saving the page in the previous step, you should see this message at the top of the page: “The item is in the ‘Awaiting Approval’ workflow state in the ‘Demo’ workflow. Approve with Test Approve Reject
Note: if you don’t see this message, try changing the workflow status of the page to draft in the Content Editor and refresh the page in Experience Editor - Click Approve with Test, add a comment, and proceed to the Preview and start test dialog box
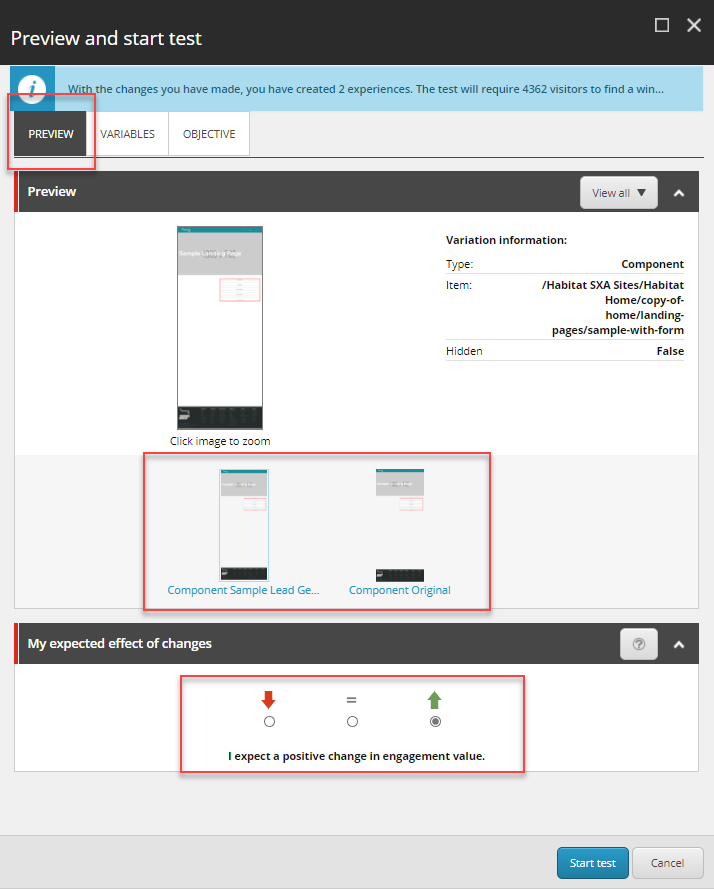
The Preview tab shows you the variations you have created to test
- Select one of the variations to see a larger view of it
- In the My expected effect of changes box, you can set that you expect a negative, no, or positive change to the engagement value due to the change you’re introducing in the test
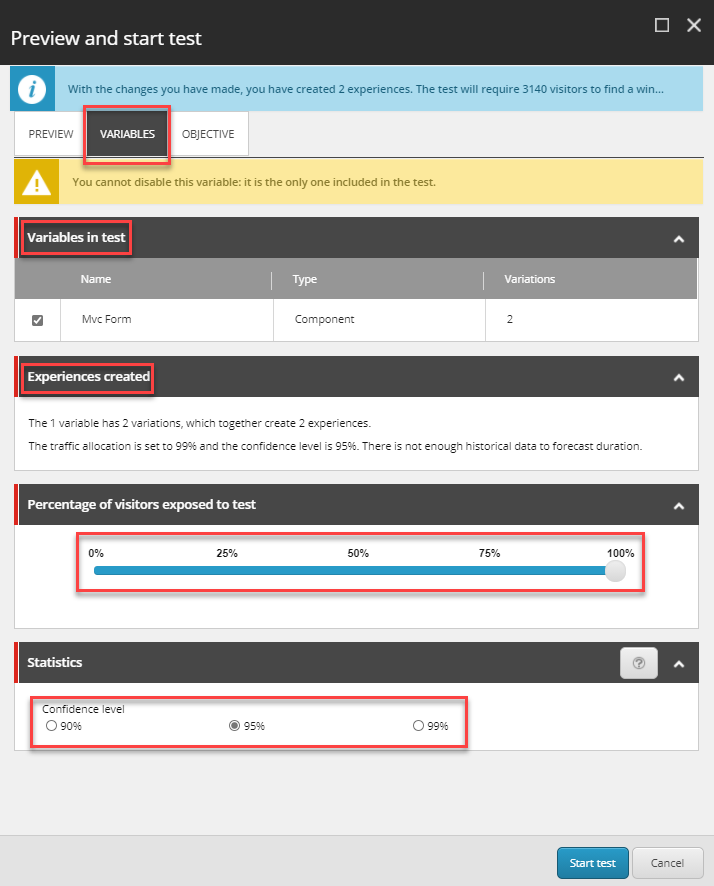
The Variables tab shows a number of test parameters that you can control
- Variables in the test shows the number of variables
- Experiences created shows the total number of experiences/variations, the traffic allocated, and the confidence level
- The percentage of visitors exposed to test is set to 100% by default. This means that by default, all visitors will participate in the test. If you have 2 experiences, your visitors will be split in half, 50% will see the first experience, and 50% will see the second
- Statistics allows you to set the confidence level that you want to have in the test results. The higher the confidence level, the larger the sample needs to be and the longer the test will take (depending on your traffic)
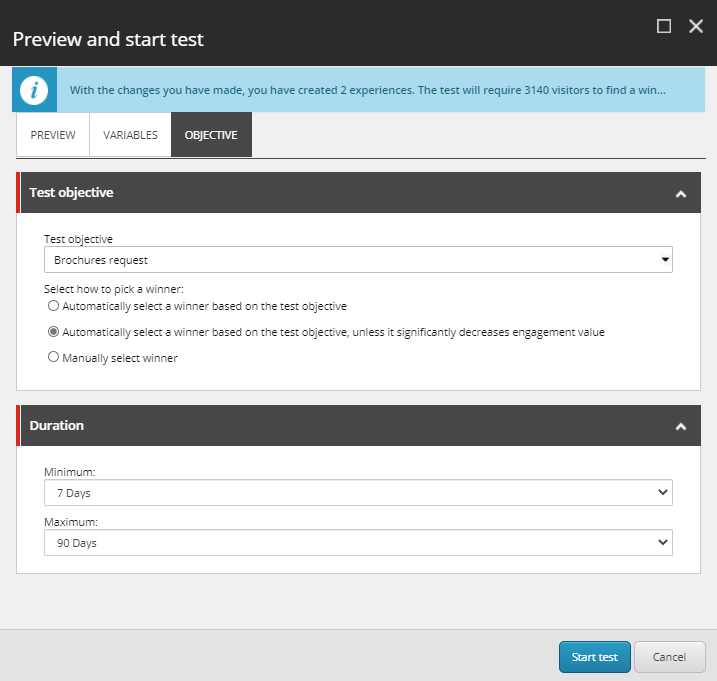
The Objective tab is where you define what you’re looking to improve by introducing the change, whether you want the winner to be selected automatically, and the maximum and minimum durations of the test
At the top of the Preview and start test dialog box, there’s a message that tells you how many experiences you have, how many visitors you need to find the winning experience, and -based on historical traffic data- how long it will take to get this number of visitors.
We will leave most things as they are in the Preview and start test dialog box, but we’ll change:
- In the Preview tab, under My expected effect of changes, set it to positive
- In Objective tab, under Test objective, select the goal that is associated with this form’s conversion. In this example I’d already created a goal that gets triggered when the form is submitted. It’s called ‘Free guide downloaded’. So, I’ll select it here and click Start test
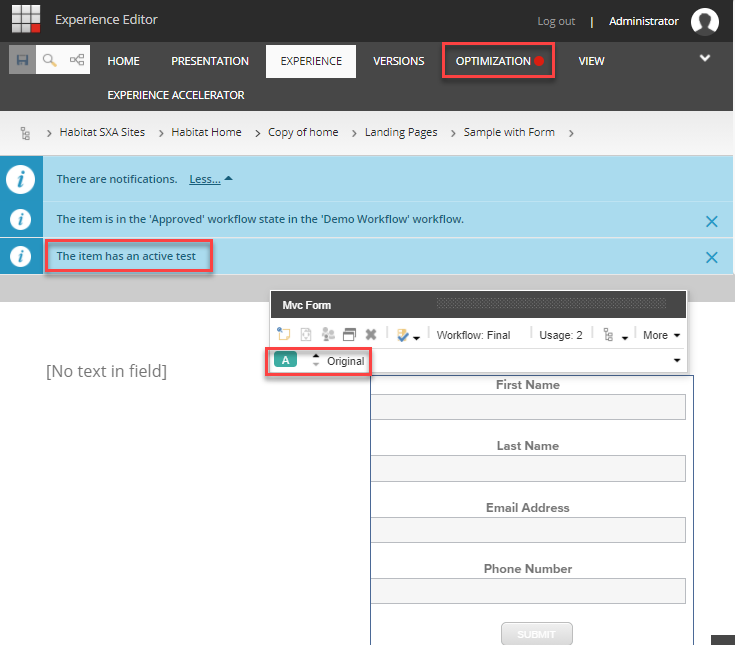
You’ll know that the test has started when you see the following:
- The optimization tab has a red dot next to it
- There’s a message at the top of the page that says there’s an active test
- The floating toolbar shows that there are variations of the form and you can toggle to see each
And there you have it! You’ve created an A/B test to optimize a Sitecore form for conversions.
This is a simple scenario, where we tested changing the copy of the action button. That’s just one of a myriad of things that you can A/B test in a form.
In the next post, we’ll be looking at the results of a component test in Sitecore. Stay tuned!


